honeywell th4110u2005 installation manual pdf

Honeywell TH4110U2005 Installation Manual PDF: A Comprehensive Guide

This guide streamlines Honeywell TH4110U2005 setup, offering clear instructions and visuals for a smooth experience. Download the PDF for detailed guidance before starting!

Understanding the Honeywell TH4110U2005

The Honeywell TH4110U2005 is a non-programmable thermostat designed for reliable temperature control in residential settings. It’s a popular choice for its simplicity and ease of use, making it suitable for those who prefer a straightforward heating and cooling experience. This thermostat offers basic functionality, allowing users to set a desired temperature and maintain it consistently.

Before diving into the installation process, it’s crucial to understand the thermostat’s core components and how they interact with your HVAC system. The installation manual PDF provides detailed diagrams and explanations of each part, including the base plate, display unit, and wiring terminals. Familiarizing yourself with these elements will significantly simplify the setup.

The TH4110U2005 is typically used with standard 24-volt heating and cooling systems. It supports various system types, including forced air, heat pump, and radiant heat. However, verifying compatibility with your specific HVAC setup is essential before proceeding with installation, as outlined in the comprehensive manual.

What is the TH4110U2005? ー Overview and Functionality

The Honeywell TH4110U2005 is a basic, non-programmable thermostat intended for controlling heating and cooling systems. It provides consistent temperature regulation without the complexities of scheduling. This model is favored for its user-friendly interface and dependable performance, making it a practical choice for many homes.

Functionally, the thermostat allows users to set a desired temperature, and the system will automatically activate to maintain that level. The installation manual PDF details how the thermostat interacts with your HVAC system, explaining the role of each wire and terminal. It’s designed for compatibility with common 24V systems.

Unlike programmable thermostats, the TH4110U2005 doesn’t offer time-based temperature adjustments. Instead, it focuses on maintaining a single, setpoint temperature. The manual emphasizes the importance of correct wiring for optimal operation and safety, providing clear diagrams to guide the installation process.

Key Features of the Honeywell TH4110U2005 Thermostat

The Honeywell TH4110U2005 boasts several key features contributing to its popularity. Its simplicity is paramount – offering straightforward temperature control without complex programming. The large, easy-to-read display ensures clear visibility of the current and set temperatures.

A crucial feature is its compatibility with various heating and cooling systems, detailed within the installation manual PDF. It supports single-stage heating and cooling, making it suitable for many residential setups. The thermostat also includes a manual changeover lever, allowing users to switch between heating and cooling modes.

The manual highlights the thermostat’s reliable operation and durable construction. While lacking smart features, its dependability and ease of use are significant advantages. Precise temperature control and a responsive system contribute to consistent comfort. The PDF provides specifics on power requirements and wiring configurations for optimal performance.

Pre-Installation Considerations

Before installation, review the Honeywell TH4110U2005 manual PDF. Ensure safety, gather necessary tools, and verify HVAC system compatibility for a smooth setup.

Safety Precautions Before Installation

Prioritize safety when installing your Honeywell TH4110U2005 thermostat. Always disconnect power to your HVAC system at the breaker box before beginning any wiring work. This prevents electrical shock and potential damage to your equipment. Carefully read the Honeywell TH4110U2005 installation manual PDF for specific warnings and safety guidelines related to your system.

Be mindful of existing wiring; label each wire before disconnecting it from the old thermostat to avoid confusion during reconnection. If you are uncomfortable working with electrical wiring, consult a qualified HVAC technician. Improper wiring can lead to system malfunction or safety hazards. Avoid working in damp or wet conditions. Wear appropriate safety glasses to protect your eyes from dust or debris.

Double-check all connections to ensure they are secure and properly insulated. Never attempt to modify or bypass any safety features of the thermostat or HVAC system. Keep the installation area clear of obstacles and ensure adequate lighting. Following these precautions will help ensure a safe and successful installation.

Tools Required for Installation

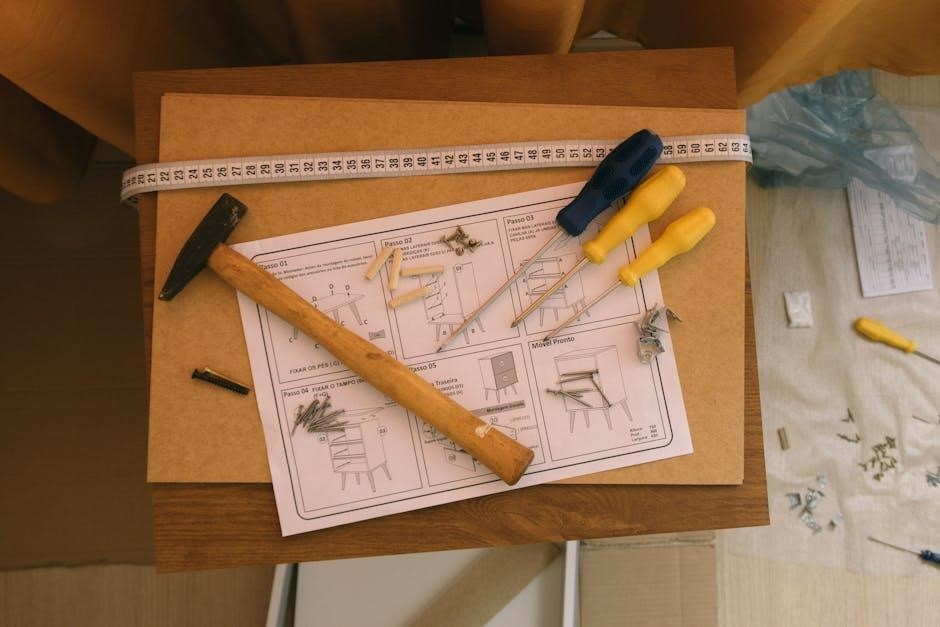
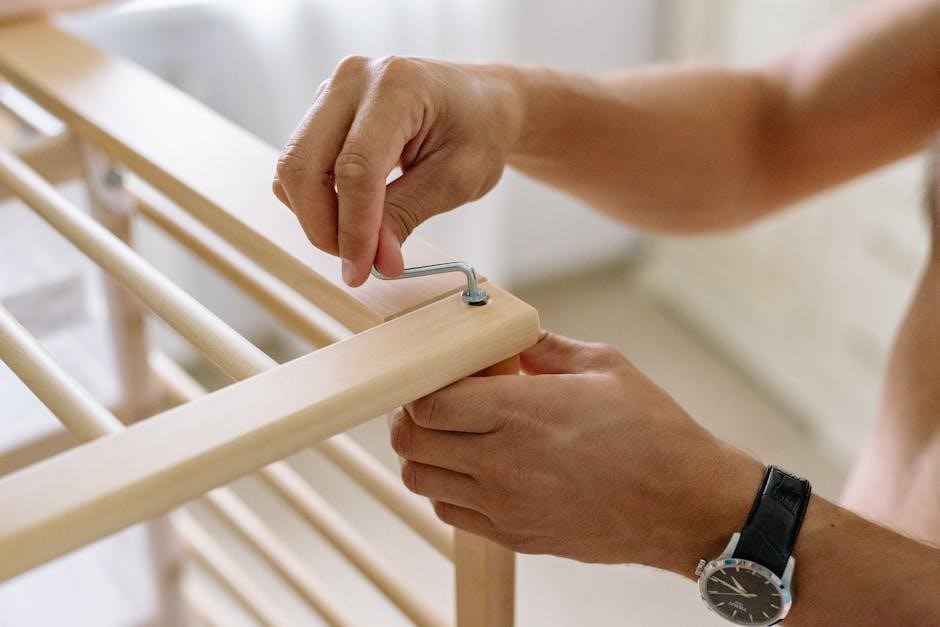
Successful installation of your Honeywell TH4110U2005 thermostat requires a few essential tools. A small screwdriver (both flathead and Phillips head) is crucial for removing and tightening screws on the thermostat and base plate. A wire stripper/cutter is necessary for preparing the thermostat wires for connection. Refer to the Honeywell TH4110U2005 installation manual PDF for wire gauge specifications.

A level ensures the thermostat is mounted straight for accurate temperature readings. A pencil is helpful for marking screw holes on the wall. Wire labels or masking tape and a pen are vital for identifying wires before disconnection. A voltage tester (non-contact) is recommended to verify power is off before working with wires.

Optional, but useful, tools include a drill with appropriate drill bits for mounting the base plate, and a vacuum cleaner for cleaning up any dust or debris. Having these tools readily available will streamline the installation process and ensure a professional result.

Compatibility Check ー HVAC System Requirements

Before installing the Honeywell TH4110U2005, verifying compatibility with your existing HVAC system is paramount. This thermostat generally supports standard 24V heating and cooling systems, including furnaces, heat pumps, and air conditioners. Consult the Honeywell TH4110U2005 installation manual PDF to confirm specific system requirements.

Crucially, the thermostat is not compatible with high-voltage systems (110V/240V) or millivolt systems. Ensure your system utilizes a common “C” wire for consistent power; if absent, a C-wire adapter may be needed. Compatibility with multi-stage heating/cooling systems varies – refer to the manual for detailed support information.

Check for compatibility with your heat pump’s reversing valve wiring. Improper wiring can damage the thermostat or HVAC system. If unsure, consult a qualified HVAC technician before proceeding with installation to avoid potential issues.

Installation Process: Step-by-Step

Follow these detailed steps, referencing the Honeywell TH4110U2005 installation manual PDF, for a successful installation. Safety first – power off your HVAC system!

Step 1: Removing the Old Thermostat

Before beginning any wiring, absolutely ensure the HVAC system’s power is completely switched off at the breaker box. This is a crucial safety precaution to prevent electrical shock. Carefully remove the cover of your existing thermostat; it may snap off or require a small screwdriver.

Take a clear photograph of the existing wiring configuration before disconnecting any wires. This photo will serve as an invaluable reference during the installation of the Honeywell TH4110U2005. Label each wire with the corresponding terminal designation – often letters like R, W, Y, G, and C – using the provided wire labels.

Gently disconnect each wire from the old thermostat’s terminals. Avoid letting the wires fall back into the wall. Remove the old thermostat’s base plate from the wall. You may need to unscrew it. Consult the Honeywell TH4110U2005 installation manual PDF for specific guidance if your old thermostat differs significantly.

Step 2: Identifying Thermostat Wires

Referencing the photograph taken during the old thermostat removal, and the wire labels applied, begin identifying each wire’s function. The ‘R’ wire typically provides power to the thermostat (24V). ‘W’ controls heating, ‘Y’ cooling, and ‘G’ the fan. A ‘C’ wire (common wire) is often required for consistent power, especially with newer smart thermostats like the TH4110U2005.

If a ‘C’ wire isn’t present, you may need to run a new wire or utilize a C-wire adapter (sold separately). Carefully examine the wire colors; while color-coding isn’t standardized, common conventions exist. Consult the Honeywell TH4110U2005 installation manual PDF for a detailed wiring diagram and color-code guide.

Double-check your identifications against the manual and your HVAC system’s documentation. Incorrect wiring can damage your system. If unsure, consult a qualified HVAC technician before proceeding. Accurate wire identification is paramount for a successful installation.

Step 3: Connecting the Wires to the TH4110U2005 Base Plate

Using the identified wires, carefully insert each one into the corresponding terminal on the TH4110U2005 base plate. Ensure each wire is fully inserted and securely fastened – a gentle tug confirms a solid connection. Refer constantly to the wiring diagram in the Honeywell TH4110U2005 installation manual PDF.

The terminals are clearly labeled with the wire designations (R, W, Y, G, C, etc.). Avoid stripping more than 3/8 inch of insulation from the wire ends. Excess wire can cause shorts, while insufficient stripping hinders connection. If using stranded wire, consider using wire ferrules for a more secure fit.

Double-check all connections against the diagram before proceeding. Loose or incorrect wiring can lead to system malfunction or damage. Take a photograph of the connected wires for future reference. A secure and accurate connection is crucial for proper thermostat operation.

Step 4: Mounting the Base Plate

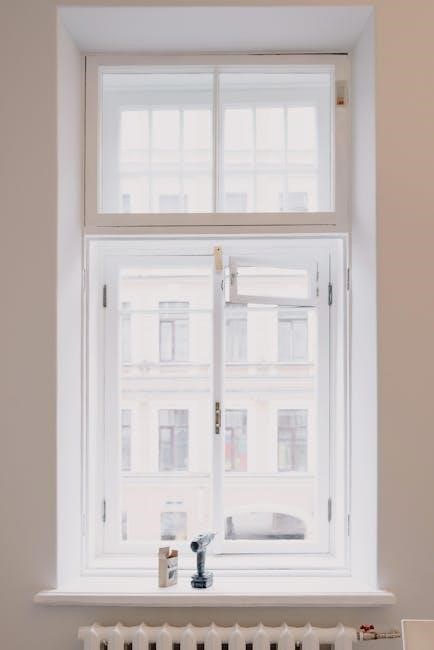
With the wires securely connected, carefully position the TH4110U2005 base plate on the wall where the old thermostat was located. Use the provided screws and wall anchors (if necessary) to mount the base plate. Ensure the base plate is level for a professional appearance and proper thermostat function. Consult the Honeywell TH4110U2005 installation manual PDF for specific mounting instructions.

If mounting to drywall, pre-drill holes using a drill bit slightly smaller than the wall anchors. Gently tap the anchors into the holes until flush with the wall surface. Then, align the base plate over the anchors and secure it with the screws. Avoid over-tightening the screws, as this could damage the base plate or the wall.

Verify the base plate is firmly attached and doesn’t wobble. A stable base is essential for securely attaching the thermostat display unit.

Step 5: Attaching the Thermostat Display

Now that the base plate is securely mounted, carefully align the Honeywell TH4110U2005 thermostat display with the base. Gently press the display onto the base plate until it clicks into place. Ensure it’s firmly seated and flush against the wall. Refer to the Honeywell TH4110U2005 installation manual PDF for detailed diagrams illustrating the attachment process.

Avoid forcing the display onto the base, as this could damage the connection pins. If it doesn’t snap on easily, double-check the alignment. Once attached, verify the display is securely connected and doesn’t feel loose. A secure connection is crucial for proper operation and accurate temperature readings.

Finally, visually inspect the installation to confirm all wires are neatly tucked away and the display is properly aligned.

Post-Installation Configuration

After installation, consult the Honeywell TH4110U2005 manual PDF to configure settings. Proper setup ensures optimal performance and personalized comfort control for your HVAC system.

Initial Power-Up and System Check

Upon completing the physical installation, referencing the Honeywell TH4110U2005 installation manual PDF is crucial for a successful start-up. Begin by restoring power to your HVAC system. The thermostat display should illuminate, initiating the self-test sequence. Carefully observe the screen for any error messages or unusual behavior during this phase.

Next, systematically test each function – heating, cooling, and fan – to verify correct operation. The manual provides specific instructions on how to activate each mode and what to expect. Listen for the HVAC system responding appropriately to each command. If any discrepancies are noted, immediately consult the troubleshooting section of the PDF manual.

Confirm that the thermostat accurately displays the current room temperature. Minor adjustments may be needed during initial calibration. Document any observations, positive or negative, as this information will be valuable if further assistance is required. A thorough system check ensures optimal performance and prevents potential issues down the line.

Setting the Date and Time

Accurate date and time settings are fundamental for proper thermostat operation, especially when utilizing scheduling features. The Honeywell TH4110U2005 installation manual PDF details the precise steps for configuration. Typically, this involves navigating through the thermostat’s menu system using the control buttons.

Access the settings menu, often labeled “Settings” or “Configuration.” Locate the “Date” and “Time” options. The manual will illustrate the button sequences required to adjust each value. Pay close attention to the 12/24-hour time format selection, ensuring it aligns with your preference.

Verify the accuracy of the set date and time after making adjustments. Correct settings are essential for the programmed schedules to function as intended. Refer to the PDF manual’s diagrams for visual guidance if needed. A properly configured date and time ensure your heating and cooling system operates efficiently and reliably.

Programming the Temperature Schedule

The Honeywell TH4110U2005 excels with its programmable temperature scheduling, optimizing comfort and energy savings. The installation manual PDF provides detailed instructions for creating customized schedules. Typically, you’ll define different temperature settings for various periods throughout the day – wake, leave, return, and sleep.

Access the scheduling menu through the thermostat’s interface. The manual will guide you through assigning specific temperatures to each time period. You can often create unique schedules for weekdays and weekends, catering to varying routines. Consider your daily activities when setting temperatures; lower temperatures while away save energy.

Review the programmed schedule carefully to ensure accuracy. Utilize the manual’s illustrations to understand the menu options. Experiment with different settings to find the optimal balance between comfort and energy efficiency. A well-programmed schedule maximizes the benefits of your thermostat.

Configuring Fan Settings

The Honeywell TH4110U2005 offers versatile fan control options, detailed within the installation manual PDF. You can typically choose between ‘Auto’ and ‘On’ modes. ‘Auto’ runs the fan only during heating or cooling cycles, conserving energy. ‘On’ keeps the fan running continuously, providing consistent air circulation and potentially improving air quality.

Access the fan settings through the thermostat’s menu system. The manual provides step-by-step guidance, often accompanied by visual aids. Consider your home’s needs when selecting a mode. Continuous fan operation can distribute air more evenly, but increases energy consumption.

Explore any additional fan features, such as a ‘circulate’ setting, which periodically runs the fan for a short duration. Refer to the manual for specific instructions on utilizing these features. Proper fan configuration enhances comfort and optimizes system performance.

Troubleshooting Common Issues

The Honeywell TH4110U2005 manual PDF details solutions for typical problems. Find fixes for power failures, inaccurate readings, and connectivity issues within its pages.

Thermostat Not Powering On

If your Honeywell TH4110U2005 thermostat fails to power on, the installation manual PDF recommends several checks. First, verify the power supply at the furnace or HVAC system is active. Confirm the circuit breaker hasn’t tripped and that the power switch is in the ‘on’ position.

Next, carefully inspect the wiring connections at both the thermostat base plate and the HVAC unit. Ensure all wires are securely fastened to their respective terminals, referencing the wiring diagram in the manual. A loose connection is a common culprit.

The manual also suggests checking the C-wire (common wire) connection. Many modern thermostats, including the TH4110U2005, require a C-wire for consistent power. If a C-wire isn’t present, a C-wire adapter might be necessary – the manual provides guidance on this. Finally, if issues persist, consult a qualified HVAC technician.

Incorrect Temperature Readings

If the Honeywell TH4110U2005 displays inaccurate temperature readings, the installation manual PDF outlines several troubleshooting steps. Initially, ensure the thermostat isn’t directly exposed to sunlight, drafts, or heat sources like lamps, as these can skew readings. Verify the thermostat is mounted on an interior wall, away from external influences.

The manual details a calibration feature within the thermostat’s settings. Access this feature to adjust the displayed temperature to match a known accurate thermometer. Carefully follow the calibration instructions in the PDF to avoid further inaccuracies.

Also, check for proper airflow around the thermostat. Blocked vents or restricted airflow can affect temperature sensing. Finally, if the problem continues, the manual suggests checking the thermostat’s location relative to the HVAC system; significant distance can sometimes cause discrepancies. Consider professional HVAC assistance if needed.

Connectivity Problems (if applicable)

The Honeywell TH4110U2005 installation manual PDF addresses potential connectivity issues if your model supports Wi-Fi or remote access. First, confirm your home Wi-Fi network is functioning correctly and has a strong signal strength near the thermostat. Ensure the thermostat is within range of your router.

The manual guides you through the pairing process, emphasizing the need to enter the correct Wi-Fi password. Double-check the password for typos. If pairing fails repeatedly, try restarting both your router and the thermostat. Refer to the manual’s section on resetting network settings.

Additionally, the PDF details troubleshooting steps for app-related problems. Verify you’re using the latest version of the Honeywell Home app. Check for firmware updates for the thermostat itself, as these often include connectivity improvements. Contact Honeywell support if issues persist.

Error Codes and Their Meanings

The Honeywell TH4110U2005 installation manual PDF includes a dedicated section deciphering error codes displayed on the thermostat. These codes signal specific issues within your HVAC system or the thermostat itself, aiding in quick diagnosis. Common codes relate to sensor malfunctions, wiring problems, or communication failures.

The manual provides a comprehensive table listing each error code, a plain-language explanation of the problem, and suggested troubleshooting steps. For example, a “Low Battery” code indicates the need for battery replacement, while a “Sensor Error” code might require professional HVAC inspection.

It’s crucial to note the error code precisely before attempting any repairs. The PDF emphasizes not ignoring error codes, as they can escalate into more significant system failures. If you’re unsure about interpreting a code or performing the recommended fix, contact a qualified HVAC technician for assistance.

Resources and Support

Access the Honeywell TH4110U2005 installation manual PDF online for detailed assistance. Find support, FAQs, and contact information on the official Honeywell website for help.

Downloading the Honeywell TH4110U2005 Installation Manual PDF

Obtaining the official Honeywell TH4110U2005 Installation Manual PDF is a crucial first step for a successful and safe installation. This comprehensive document provides detailed diagrams, wiring schematics, and step-by-step instructions tailored specifically to your thermostat model. You can typically find the PDF available for direct download from the official Honeywell Home website.

Simply navigate to the support section of their website and search for “TH4110U2005” or browse their thermostat manuals. Alternatively, a quick internet search using the exact model number and “installation manual PDF” will often yield direct links to the downloadable file. Ensure you are downloading from a reputable source, such as Honeywell’s official website, to avoid potentially harmful or inaccurate information.

Having the PDF readily available during the installation process allows you to easily reference specific instructions, troubleshoot potential issues, and ensure proper wiring connections. It’s a valuable resource for both DIY enthusiasts and professional installers alike, guaranteeing a smooth and efficient setup experience.

Honeywell Support Website and Contact Information

For further assistance beyond the Honeywell TH4110U2005 Installation Manual PDF, Honeywell offers a robust support network. The primary resource is the Honeywell Home website (honeywellhome.com), which features an extensive FAQ section, troubleshooting guides, and downloadable resources. You can often find answers to common questions and solutions to installation challenges directly on their site.

If you require direct support, Honeywell provides several contact options. Their customer support team can be reached via phone; check the website for the most current number as it may vary by region. Additionally, Honeywell often offers online chat support for immediate assistance. For more complex issues, a contact form is available on their website, allowing you to submit detailed inquiries and receive a personalized response.

Remember to have your thermostat model number (TH4110U2005) readily available when contacting support to expedite the assistance process. Utilizing these resources ensures you have the help needed for a successful installation and ongoing operation.

Frequently Asked Questions (FAQ)

Q: Where can I find the TH4110U2005 Installation Manual PDF? A: It’s readily available on the Honeywell Home website, often linked directly from their support pages. A simple online search for “Honeywell TH4110U2005 manual PDF” will also yield results.

Q: Is the TH4110U2005 compatible with my existing HVAC system? A: Refer to the compatibility section within the installation manual PDF. Generally, it supports most standard 24V heating and cooling systems, but verification is crucial.

Q: What do the different wire colors mean? A: The manual PDF provides a detailed wiring diagram explaining each wire’s function (R, W, Y, G, C, etc.). Incorrect wiring can damage your system, so careful identification is essential.

Q: Can I program a different schedule for each day of the week? A: Yes, the TH4110U2005 allows for fully customizable daily schedules, offering flexibility to match your lifestyle. Consult the programming section of the manual PDF for instructions.

lifesmart infrared heater instruction manual

LifeSmart Infrared Heater: A Comprehensive Instruction Manual Guide

Welcome! This guide provides essential instructions for your LifeSmart Infrared Heater, ensuring safe and efficient operation․ Explore detailed setup, controls, and troubleshooting steps today!

Access archived manuals and resources via the embedded link, offering supplementary information for your heating experience․

Understanding Your LifeSmart Infrared Heater

How it Works: Your LifeSmart Infrared Heater utilizes radiant heating technology, directly warming objects and people rather than the air․ This provides a more efficient and comfortable heating experience, especially in targeted areas․ Unlike traditional heaters, infrared heat isn’t affected by drafts, offering consistent warmth․

Key Components: The heater consists of infrared elements, a control panel (or remote receiver), a power cord, and potentially smart connectivity features․ Understanding these components is crucial for proper operation and maintenance․ The housing is designed for durability and safety, ensuring long-lasting performance․

Radiant vs․ Convection: It’s important to differentiate between radiant and convection heating․ Convection heaters warm the air, which then warms objects․ Radiant heaters, like yours, provide direct warmth, minimizing energy waste and creating a more focused heating solution․ This makes it ideal for personal comfort or spot heating within a larger space․

Refer to archived resources for detailed diagrams and component explanations․

Key Features and Benefits

Efficient Heating: Experience rapid and focused warmth with infrared technology, directly heating you and objects, reducing energy waste compared to traditional heaters․ Enjoy cost-effective heating solutions for your home or office․

Smart Control: Many LifeSmart heaters offer app control and voice assistant compatibility (if applicable), allowing remote operation and scheduling for ultimate convenience․ Integrate seamlessly into your smart home ecosystem․

Safety First: Built-in safety features like overheat protection and tip-over switches ensure worry-free operation․ The cool-touch exterior minimizes burn risks, making it safe for households with children or pets․

Portable Design: Lightweight and compact, the heater is easily moved from room to room, providing targeted warmth where you need it most․ Enjoy versatile heating solutions throughout your living space․

Explore archived manuals for specific feature details related to your model․

Safety Precautions – Important Information

Read all instructions carefully before operating your LifeSmart Infrared Heater․ Never use the heater near flammable materials, water, or in bathrooms․ Maintain a safe distance of at least 3 feet from furniture and curtains․

Always plug the heater directly into a wall outlet; do not use extension cords or power strips․ Inspect the power cord regularly for damage and discontinue use if any are found․ Unplug the heater when not in use and during cleaning․

Never cover the heater or obstruct the air intake/outlet․ Do not operate with a damaged cord or plug․ This heater is intended for indoor use only․ Supervise children and pets around the heater at all times․

Refer to archived manuals for detailed safety guidelines specific to your model․

Package Contents – What’s Included

Your LifeSmart Infrared Heater package should include the following items․ Please verify all components are present before proceeding with setup․ The package contains: One (1) LifeSmart Infrared Heater unit, carefully packaged for protection during transit․

Additionally, you will find: One (1) Remote Control (batteries may or may not be included – check packaging), One (1) Instruction Manual (this document!), and Four (4) Stabilizing Feet for secure placement․ Depending on the model, you may also receive a mounting bracket and associated hardware․

If any items are missing or damaged, do not operate the heater․ Contact customer support immediately for assistance and replacement parts․ Refer to archived resources for potential component diagrams․

Setting Up Your LifeSmart Heater

Before you begin, ensure you have all package contents verified (see previous section)․ Choose a location for your heater that is stable, level, and away from flammable materials – maintain at least 3 feet of clearance․ Attach the stabilizing feet to the base of the heater, ensuring they are securely fastened․

If you intend to wall-mount the heater (if your model supports this), carefully follow the mounting bracket instructions․ Do not place the heater near water sources or in areas with high humidity․ Ensure the power cord will reach a grounded electrical outlet without being a tripping hazard․

Review archived diagrams for visual guidance on component placement and assembly․ Proper setup is crucial for safe and efficient operation․

Initial Setup and Placement Guidelines

Optimal placement maximizes heating efficiency․ Position the heater to directly warm occupants, rather than aiming at empty space․ Avoid obstructions like furniture or curtains that may block heat distribution․ For room-wide heating, a central location is generally best․

Ensure adequate ventilation around the heater to prevent overheating․ Do not place it directly under electrical outlets or near easily flammable items like paper or fabrics․ Consider the heater’s infrared properties – direct line of sight is key for effective warmth;

Refer to archived resources for suggested placement scenarios based on room size and layout․ Initial setup significantly impacts performance and safety․

Connecting to Power – A Step-by-Step Guide

Step 1: Verify the voltage indicated on the heater’s base matches your household power supply․ Step 2: Locate a grounded electrical outlet capable of handling the heater’s wattage․ Avoid using extension cords or power strips whenever possible; direct connection is safest․

Step 3: Ensure the power switch is in the “OFF” position before plugging in the heater․ Step 4: Firmly insert the power plug into the outlet․ You should hear a click confirming a secure connection․ Step 5: If the heater doesn’t power on, double-check the outlet’s functionality with another device․

Consult archived manuals for specific power requirements and safety warnings․ Proper connection prevents electrical hazards and ensures optimal heater operation․

Operating Your LifeSmart Heater

Initial Operation: After connecting to power, press the power button to activate the heater․ The control panel will illuminate, indicating the unit is ready․ Basic Controls: Utilize the “+” and “-” buttons to adjust the desired temperature․ The current temperature will be displayed on the screen․

Heating Modes: Select from available heating modes (Low, Medium, High) using the mode button․ Each mode offers a different heat output․ Remote Control: The included remote control duplicates all functions of the control panel for convenient operation from a distance․

Refer to archived resources for detailed explanations of each function․ Always monitor the heater during initial use and ensure adequate ventilation․ Proper operation maximizes comfort and efficiency․

Powering On/Off and Basic Controls

Powering On: To activate your LifeSmart Infrared Heater, firmly press the prominent power button located on the control panel or utilize the corresponding button on the remote control․ A clear indicator light will illuminate, confirming the unit is operational․

Powering Off: Press the power button again to deactivate the heater․ The indicator light will extinguish, signifying the unit is safely turned off․ Temperature Adjustment: Employ the intuitive “+” and “-” buttons to precisely set your desired room temperature․

Mode Selection: Cycle through available heating modes – Low, Medium, and High – using the dedicated mode button․ Consult archived resources for optimal settings․ Ensure proper ventilation during operation․

Temperature Settings and Adjustment

Adjusting the Temperature: Your LifeSmart Infrared Heater offers precise temperature control via the “+” and “-” buttons on the unit’s control panel, or conveniently through the remote control․ Each press adjusts the set temperature by 1°C/2°F․

Temperature Range: The heater operates within a temperature range of 15°C to 37°C (59°F to 99°F)․ The current set temperature is displayed on the digital screen․ For optimal comfort, begin with a moderate setting and adjust as needed․

Preset Modes: Explore preset temperature modes like ‘Comfort’, ‘Eco’, and ‘Fast Heat’ for simplified operation․ Refer to archived manuals for detailed mode descriptions․ Always ensure adequate space around the heater for efficient heat distribution․

Timer Function – Scheduling Your Heat

Setting the Timer: The LifeSmart Infrared Heater’s timer function allows you to schedule operation for convenient and energy-efficient heating․ Access the timer settings via the “Timer” button on the control panel or remote control․

Timer Duration: You can set the timer to automatically turn off the heater after a specified duration, ranging from 30 minutes up to 8 hours, in 30-minute increments․ The remaining time will be displayed on the digital screen․

Scheduling Options: Some models may offer 24-hour scheduling, enabling you to pre-set heating times for different parts of the day․ Consult archived manuals for advanced scheduling features․ Ensure the clock is accurately set for precise timer operation․

Remote Control Operation – A Detailed Overview

Remote Control Functions: Your LifeSmart Infrared Heater includes a dedicated remote control for convenient operation from a distance․ The remote replicates all functions available on the heater’s control panel, including power on/off, temperature adjustment, and timer settings․

Button Layout: Familiarize yourself with the button layout․ Key buttons include Power, Temperature Up/Down, Timer, and Mode selection․ Ensure the remote is pointed directly at the heater’s receiver for optimal responsiveness․

Battery Installation: The remote requires batteries (typically AAA or AA – check your model’s specifications)․ Replace batteries when the remote’s range diminishes or becomes erratic․ Refer to archived resources for specific battery types; Proper battery installation ensures reliable control․

Maintenance and Troubleshooting

Regular Maintenance: To ensure optimal performance and longevity, perform routine maintenance on your LifeSmart Infrared Heater․ This primarily involves keeping the heating elements clean and free from dust accumulation․ Disconnect the heater from the power source before cleaning․

Cleaning Procedure: Use a soft, dry cloth to wipe down the exterior surfaces․ Avoid using abrasive cleaners or liquids, as these can damage the finish․ For stubborn dirt, a slightly damp cloth may be used, followed by thorough drying․

Troubleshooting Common Issues: If the heater fails to power on, check the power cord and outlet․ If the heater isn’t heating, verify the temperature setting and ensure the timer isn’t active․ Consult archived manuals for detailed error code explanations and solutions․

Cleaning Your LifeSmart Heater

Safety First: Before initiating any cleaning procedure, always disconnect your LifeSmart Infrared Heater from the power outlet․ This prevents accidental electric shock and ensures your safety during maintenance․ Allow the unit to cool completely before handling․

Exterior Cleaning: Use a soft, dry cloth to gently wipe down the exterior surfaces of the heater․ Avoid applying excessive pressure, which could damage the finish․ For fingerprints or light dust, a microfiber cloth works exceptionally well․

Heating Element Care: Do not use liquids or abrasive cleaners on the heating elements․ A soft brush attachment on a vacuum cleaner can carefully remove dust buildup․ Refer to archived resources for specific cleaning recommendations related to your model․

Regularity: Clean your heater regularly, especially during and after peak heating seasons, to maintain optimal performance․

Common Issues and Solutions

Heater Won’t Turn On: First, verify the power cord is securely plugged into a functioning outlet․ Check your circuit breaker or fuse box to ensure the circuit hasn’t tripped․ If the issue persists, consult archived manual resources for model-specific troubleshooting․

Insufficient Heat: Ensure the heater isn’t obstructed by furniture or curtains․ Confirm the desired temperature setting is appropriately adjusted․ A dirty heating element can also reduce efficiency – refer to the ‘Cleaning’ section․

Remote Control Not Working: Replace the batteries in the remote․ Ensure there’s a clear line of sight between the remote and the heater’s receiver․ Try resetting the heater by unplugging it for a few minutes․

Error Codes: Refer to the ‘Error Codes and Their Meanings’ section for specific guidance․

Error Codes and Their Meanings

E1: Overheat Protection․ The heater has detected an internal overheating condition․ Immediately power off the unit and allow it to cool completely before attempting to restart․ Ensure proper ventilation isn’t obstructed․

E2: Sensor Failure․ Indicates a malfunction with the internal temperature sensor․ Contact customer support for assistance, as this may require professional repair․ Do not attempt self-repair․

E3: Tip-Over Switch Activated․ The heater has detected it’s been tipped over․ Carefully upright the heater on a stable, level surface․ The unit should reset automatically, but may require a power cycle․

E4: Communication Error․ (App-Controlled Models) Indicates a loss of connection between the heater and the LifeSmart app․ Check your Wi-Fi connection and app settings․ Consult archived resources for connectivity troubleshooting․

Advanced Features & Smart Home Integration

App Control: Download the LifeSmart Living app (iOS & Android) for remote control of your heater․ Adjust temperature, set timers, and monitor energy usage from anywhere with an internet connection․ Explore customized heating schedules for optimal comfort․

Voice Control: Seamlessly integrate your LifeSmart heater with Amazon Alexa or Google Assistant․ Use voice commands to power on/off, adjust temperature, and more – hands-free convenience at its finest! Ensure proper app linking for functionality․

Smart Scenes: Create automated “scenes” within the LifeSmart app․ For example, a “Cozy Evening” scene could dim lights and set the heater to a comfortable temperature simultaneously․ Explore archived resources for scene creation tips․

IFTTT Compatibility: Connect your heater to other smart devices using IFTTT (If This Then That) for advanced automation possibilities․

App Control and Connectivity (if applicable)

LifeSmart Living App: Download the free LifeSmart Living app from the App Store (iOS) or Google Play Store (Android)․ Create an account or log in to an existing one to begin connecting your infrared heater․

Wi-Fi Connection: Ensure your smartphone and heater are connected to a stable 2․4 GHz Wi-Fi network․ The app will guide you through the pairing process, requiring your Wi-Fi password․ A strong signal is crucial for reliable control․

Device Discovery: Within the app, select “Add Device” and follow the on-screen instructions to discover your LifeSmart heater․ The heater may need to be in pairing mode (refer to the ‘Setting Up’ section)․

Remote Access: Once connected, you can control your heater remotely, adjust settings, and monitor its status from anywhere with an internet connection․ Explore archived app tutorials for advanced features․

Voice Control Compatibility (if applicable)

Seamless Integration: Your LifeSmart Infrared Heater is designed for compatibility with popular voice assistants like Amazon Alexa and Google Assistant, offering hands-free control․

Linking Your Account: Within the Alexa or Google Home app, navigate to “Skills” or “Services” and search for “LifeSmart․” Enable the skill/service and link it to your LifeSmart Living account․

Voice Commands: Once linked, you can use voice commands such as “Alexa, turn on the heater” or “Hey Google, set the heater to 70 degrees․” Discover a full list of supported commands within the LifeSmart Living app․

Custom Routines: Integrate your heater into custom routines for automated heating schedules․ For example, “Good Morning” could turn on the heater and adjust the temperature․ Explore archived voice control guides for optimal setup․

Energy Saving Tips for Optimal Use

Maximize Efficiency: To minimize energy consumption and lower heating costs, utilize these practical tips with your LifeSmart Infrared Heater․ Strategic use enhances comfort while reducing your carbon footprint․

Zone Heating: Focus heat only on occupied rooms, rather than heating the entire house․ Infrared heaters excel at providing targeted warmth, making them ideal for zone heating․

Smart Scheduling: Leverage the timer function within the LifeSmart Living app to schedule heating periods aligning with your daily routine․ Avoid unnecessary operation during unoccupied times․

Temperature Optimization: Lower the thermostat or heater setting by a few degrees and utilize layers of clothing for added warmth․ Every degree saved contributes to energy conservation․ Consult archived resources for further efficiency insights․

i 751 sample affidavit of friends letter pdf

The I-751 sample affidavit of friends letter is a crucial document supporting the petition to remove conditions on residency. It provides a sworn statement from friends or family, detailing their knowledge of the marriage’s legitimacy and the couple’s relationship. This letter serves as evidence of the bona fide nature of the marriage, helping to establish credibility in the petition process. It is typically written in a formal tone, including personal information, relationship history, and specific examples to validate the marriage’s authenticity. The affidavit must be notarized and submitted alongside other supporting documents to strengthen the case. It is essential to ensure accuracy and detail to avoid delays or complications in the I-751 process.

Overview of the I-751 Petition

The I-751 petition is a critical legal document filed by conditional residents to remove the conditions on their green card, transitioning to permanent residency. It is typically submitted within 90 days of the conditional residency period expiring, usually 2 years after obtaining the initial status. The petition requires substantial evidence to prove the marriage’s legitimacy and continuity, ensuring it was not entered into solely for immigration benefits. Couples must demonstrate ongoing cohabitation, shared financial responsibilities, and a genuine relationship. The I-751 affidavit of friends letter serves as supplementary evidence, providing third-party validation of the marriage’s authenticity. Failure to file the petition correctly or provide sufficient documentation can result in denial or removal proceedings. This process underscores the importance of thorough preparation and compliance with USCIS requirements.

Importance of the Affidavit of Friends in the I-751 Process

The affidavit of friends plays a pivotal role in the I-751 process by providing third-party validation of the marriage’s legitimacy. It offers an objective perspective, reinforcing the credibility of the petition. Friends or family members can attest to the couple’s relationship history, cohabitation, and shared experiences, which helps establish the bona fide nature of the marriage. This document is particularly valuable when primary evidence, such as joint financial records, is limited. By including specific examples and personal observations, the affidavit strengthens the petition and demonstrates the couple’s commitment to a genuine marital relationship. While not mandatory, it significantly enhances the likelihood of a successful outcome by addressing potential concerns or gaps in documentation.

Structure of the I-751 Affidavit Letter

The I-751 affidavit letter typically includes personal information, relationship history, marriage details, statements confirming the marriage’s legitimacy, and a conclusion with a signature, ensuring a comprehensive and credible submission.

Personal Information and Contact Details

The affidavit begins with the friend’s full name, complete address, phone number, and email. This section establishes the affiant’s identity and credibility. It is essential to provide accurate and up-to-date contact information to ensure the document’s legitimacy. The friend must state their relationship to the applicant, such as “friend” or “family member,” and confirm how long they have known the couple. Including this information helps establish the affiant’s familiarity with the marriage and their ability to attest to its genuineness. The personal details section sets the foundation for the rest of the affidavit, demonstrating the affiant’s reliability as a witness to the marriage’s bona fide nature.

Relationship History with the Applicant

This section details how the affiant met the applicant and the duration of their relationship. It is crucial to describe the nature of their friendship, such as shared activities, frequent interactions, or mutual interests. The affiant should explain how they have witnessed the applicant’s marriage, including when they first met the spouse and how they have observed the relationship evolve. Specific examples, like attending events together or witnessing daily interactions, add credibility. The affiant should also mention their belief in the marriage’s genuineness, based on their observations of the couple’s behavior and commitment to each other. This section helps establish the affiant’s familiarity with the applicant and their marriage, reinforcing the petition’s credibility.

Details About the Marriage and Spouse

This section provides specific information about the applicant’s spouse and the marriage. The affiant should describe how they met the spouse, their relationship dynamics, and interactions with the couple. It is important to include details about the spouse’s character, shared responsibilities, and how they support each other. The affiant may mention joint activities, such as vacations, family gatherings, or daily routines, to illustrate the couple’s commitment. Specific examples, like helping with household chores or attending important events together, demonstrate the marriage’s legitimacy. The affiant should also state their belief in the marriage’s genuineness, based on their observations of the couple’s behavior and mutual respect. This section helps establish the spouse’s role in the relationship and the marriage’s authenticity, supporting the I-751 petition’s credibility.

Statements Confirming the Bona Fide Nature of the Marriage

This section is dedicated to affirming the genuine nature of the marriage. The affiant should clearly state their belief that the marriage is legitimate and not entered into for immigration purposes. They may describe specific interactions or observations that demonstrate the couple’s commitment to each other, such as shared responsibilities, mutual respect, and emotional support. The affiant should also mention any joint activities, like purchasing a home, raising children, or making long-term plans together, which further validate the marriage’s authenticity. It is important to emphasize the couple’s public displays of affection and their integration into each other’s lives. These statements help establish credibility and reinforce the petition by providing an outsider’s perspective on the marriage’s legitimacy. The affiant’s testimony plays a critical role in confirming the bona fide nature of the relationship.

Conclusion and Signature

The conclusion of the affidavit reaffirms the affiant’s belief in the legitimacy of the marriage and their commitment to providing truthful testimony. This section typically includes a statement such as, “I swear or affirm that the information provided in this affidavit is true and correct to the best of my knowledge.” The affiant must then sign and date the document in the presence of a notary public, who will also add their official stamp or seal. The signature section is a critical legal requirement, as it validates the affidavit and confirms the affiant’s accountability for the statements made. Proper notarization ensures the document’s authenticity and admissibility in the I-751 petition process. The affiant’s full name, address, and contact information are also included for reference. This final step completes the affidavit, making it a legally binding declaration.

Legal Requirements for the I-751 Affidavit

The I-751 affidavit must be notarized, include the affiant’s personal information, and be written in a formal tone. It must avoid legal errors to prevent delays.

Who Can Write the Affidavit

The affidavit for the I-751 petition can be written by a credible third party, such as a close friend, family member, or colleague, who has personal knowledge of the marriage. The individual must be a U.S. citizen or lawful permanent resident and should have known the couple for at least two years. They must provide detailed information about their relationship with the applicants and their firsthand observations of the marriage. The affiant must also be willing to testify if required. It is important that the person writing the affidavit has no financial or legal conflicts of interest with the petitioners. Their credibility and honesty are crucial to the validity of the affidavit. The affiant’s statement should be based on personal experiences and observations, ensuring the document’s authenticity and reliability.

Language and Formatting Guidelines

The affidavit must be written in clear, formal English, avoiding slang or jargon. It should be typed on plain white paper with proper formatting, including headings, paragraphs, and a logical structure. The language must be concise and factual, focusing on relevant details about the marriage and relationship. Grammar and spelling should be correct to maintain professionalism. The affidavit should not include unnecessary personal opinions or speculative statements. Proper formatting includes using a standard font, consistent margins, and clear section headings. The document should be free of errors and inconsistencies to ensure credibility. It is essential to follow these guidelines to present a professional and credible affidavit that supports the I-751 petition effectively.

Notarization and Authentication

The affidavit must be notarized to authenticate the signer’s identity and confirm the voluntary nature of the statement. A licensed notary public must witness the signing, verify the signer’s identity through valid government-issued ID, and affix their official seal or stamp. The notarization process ensures the document’s legitimacy and admissibility in legal proceedings. Proper authentication is critical to avoid delays or rejection of the I-751 petition. The notary’s signature, date, and seal must be clearly visible. Failure to properly notarize the affidavit can result in its inadmissibility. It is essential to follow state-specific notarization requirements and ensure the document meets all legal standards. This step is a critical part of the affidavit’s validity and the overall petition process.

Common Legal Mistakes to Avoid

When preparing the affidavit, several legal mistakes must be avoided to ensure its validity and effectiveness. One common error is providing insufficient or vague details about the relationship, which can raise doubts about the marriage’s authenticity. Another mistake is failing to include specific examples or anecdotes that demonstrate the couple’s interactions and shared life. Additionally, omitting the notarization process or failing to meet state-specific notary requirements can render the affidavit invalid. It is also crucial to avoid inaccuracies in personal information, such as incorrect names, addresses, or dates, as this can lead to delays or rejection. Lastly, using informal language or deviating from the required format can undermine the document’s professionalism and credibility. Ensuring precision, completeness, and adherence to legal standards is essential to avoid complications in the I-751 process.

Sample Content for the I-751 Affidavit

The sample affidavit includes sections for personal information, relationship history, marriage details, and statements confirming the marriage’s legitimacy. It provides a template with placeholders for customization, ensuring clarity and professionalism while adhering to legal requirements. The document is structured to guide the affiant through each necessary detail, from initial acquaintance to ongoing interactions, and concludes with a formal declaration and notarized signature. This sample serves as a practical reference for drafting a compelling and compliant affidavit in support of the I-751 petition.

The sample introduction section begins with the affiant’s personal details, including their full name, address, and contact information. It also states their relationship to the applicant and spouse, explaining how they know the couple. This section is typically formal, with the affiant swearing under penalty of perjury that their statements are true. The introduction sets the tone for the affidavit, establishing the affiant’s credibility and familiarity with the marriage. It may include a statement like, “I have known [Applicant’s Name] and [Spouse’s Name] since [date] and can attest to the genuine nature of their relationship.” This section is crucial for establishing the affiant’s qualifications to provide testimony. Placeholders are often included for customization, ensuring the affidavit aligns with the specific circumstances of the case.

Sample Relationship History and Marriage Details

In the relationship history section, the affiant describes how they met the applicant and spouse, detailing the duration of their acquaintance. They may mention specific events or gatherings where they observed the couple together, such as holidays, weddings, or family dinners. The affidavit typically includes the date and location of the marriage, as well as the affiant’s attendance if applicable. It also highlights the couple’s interactions, such as shared hobbies, vacations, or daily activities, to illustrate their bond. The affiant may note how the couple supports each other emotionally and financially, demonstrating their commitment. This section provides a narrative of the relationship’s evolution, showcasing its authenticity and depth. Specific examples, like joint decisions or shared responsibilities, further validate the marriage’s legitimacy.

Sample Statements About the Bona Fide Marriage

In this section, the affiant attests to the genuine nature of the marriage, emphasizing the couple’s mutual respect, trust, and commitment. They may state that the relationship is not for immigration purposes but based on a deep emotional connection. Specific examples, such as joint financial decisions, shared household responsibilities, or mutual support during challenges, are often included to demonstrate the marriage’s legitimacy. The affiant may also mention the couple’s long-term goals, such as purchasing a home, starting a family, or planning a future together. These statements highlight the couple’s integration into each other’s lives and their intention to maintain a lifelong partnership. The affiant’s observations and beliefs about the marriage’s authenticity are clearly articulated to support the petition.

Sample Conclusion and Signature Section

The conclusion reaffirms the affiant’s belief in the marriage’s genuineness and their commitment to providing truthful information. It typically ends with a statement like, “I swear or affirm that the information provided is true and correct to the best of my knowledge.” The signature section requires the affiant’s full name, signature, and date. Including contact information, such as a phone number and address, adds credibility. The affiant must sign the document in the presence of a notary public, who then stamps or seals the affidavit. This section ensures the letter is legally binding and authentic, completing the affidavit’s formal requirements. Proper execution is essential for the document to be accepted as valid evidence in the I-751 petition process.

Tips for Writing an Effective I-751 Affidavit

Be clear, honest, and detailed. Provide specific examples to validate the marriage. Avoid legal jargon and ensure the tone is sincere. Notarize the document to authenticate it. Proofread for errors and inconsistencies to maintain credibility. Ensure all statements align with the couple’s relationship timeline and circumstances. Focus on highlighting the bona fide nature of the marriage through personal observations and experiences. Avoid including irrelevant information to keep the affidavit concise and impactful. Seek legal advice if unsure about any aspect of the process to ensure compliance with USCIS requirements.

Guidelines for Tone and Language

The tone of the I-751 affidavit should be sincere, clear, and formal. Avoid using overly emotional or casual language, as the document must maintain professionalism. Use simple, straightforward language to ensure clarity and avoid misunderstandings. Legal jargon should be avoided unless necessary, and the focus should remain on providing factual, personal observations. The affidavit must be truthful and avoid exaggerations or speculative statements. It is essential to maintain a neutral and objective tone, sticking strictly to the facts. Personal experiences and specific examples are encouraged to validate the marriage’s legitimacy. Ensure the language is concise and free of errors, as this reflects credibility. The affidavit should also be written in the first person, as it is a personal statement from the affiant. Notarization ensures the document’s authenticity, further reinforcing its credibility.

How to Avoid Errors and Inconsistencies

To ensure the I-751 affidavit is error-free and consistent, carefully review the document for factual accuracy and proper formatting. Avoid inconsistencies in dates, names, and details about the relationship or marriage. Use a clear and logical structure, ensuring each statement aligns with the previous one. Double-check personal information, such as names, addresses, and contact details, to prevent discrepancies. Avoid using legal jargon or ambiguous language that could confuse the reader. It is also important to ensure the affidavit is signed and notarized correctly. Having a trusted individual review the document for clarity and accuracy can help identify potential errors. Providing specific examples and avoiding vague statements will strengthen the affidavit’s credibility. Any inconsistencies or errors could lead to delays or complications in the petition process, so attention to detail is crucial.

Importance of Including Specific Examples

Including specific examples in the I-751 affidavit is essential to demonstrate the authenticity of the marriage and the depth of the relationship. Vague statements may appear insufficient or unconvincing, while detailed examples provide concrete evidence of the couple’s interactions and shared life. For instance, describing joint activities, conversations, or observations of the couple’s behavior can help establish credibility. Specific examples also highlight the witness’s firsthand knowledge of the relationship, making the affidavit more persuasive. Avoid general statements and instead focus on particular events or patterns that illustrate the couple’s commitment to one another. This approach strengthens the petition by providing tangible proof of the marriage’s bona fide nature, which is critical for a successful I-751 submission.

Additional Evidence to Support the I-751 Petition

Photographs, correspondence, and joint financial documents are crucial. Including proof of shared responsibilities, such as bills or leases, strengthens the case. Submitting evidence like travel itineraries or witness statements also helps validate the marriage’s authenticity and demonstrates a shared life together.

Photographs and Correspondence

Photographs and correspondence are essential evidence to support the I-751 petition. Include wedding photos, vacation pictures, and images of daily life together to demonstrate a shared life. Correspondence, such as emails, letters, or text messages, should show ongoing communication and a genuine relationship. Organize these documents chronologically to highlight the progression of the marriage. Ensure photographs are clear and dated, while correspondence includes context about the discussions. These items help establish the couple’s bond and commitment, providing tangible proof of a bona fide marriage. Submitting a variety of visual and written evidence strengthens the petition and demonstrates the couple’s shared experiences and connection over time.

Joint Financial Documents and Accounts

Joint financial documents and accounts are critical evidence in supporting the I-751 petition, as they demonstrate the couple’s shared financial responsibilities and commitment to a life together. Examples include joint bank statements, credit card accounts, loans, tax returns, and property deeds. These documents show financial interdependence and a mutual commitment to managing household expenses. They also highlight the couple’s joint ownership of assets and liabilities, which is a key indicator of a bona fide marriage. It is important to submit recent and comprehensive records to illustrate the ongoing nature of the financial partnership. Including these documents strengthens the petition by providing tangible proof of the couple’s shared financial life and long-term planning together.

Other Supporting Documents

Beyond joint financial records and affidavits, other supporting documents play a vital role in strengthening the I-751 petition. These may include utility bills, rental agreements, insurance policies, and vehicle registrations in both spouses’ names, demonstrating shared responsibilities. Photographs of the couple together, with family and friends, and during significant events can also be submitted to illustrate the progression of the relationship. Correspondence, such as emails, text messages, and letters, provides further evidence of ongoing communication and commitment. Additionally, documents like airplane tickets, hotel receipts, and itineraries from trips taken together can highlight the couple’s shared experiences. These diverse documents collectively paint a comprehensive picture of the marriage’s legitimacy and the couple’s intertwined lives, helping to establish credibility in the petition process.

Common Mistakes in the I-751 Affidavit

Common mistakes include inaccuracies in personal information, insufficient detail about the relationship, and failure to notarize the document. These errors can delay or complicate the petition process.

Inaccuracies in Personal Information

Inaccuracies in personal information are a common mistake in the I-751 affidavit. These errors can include typos in names, incorrect addresses, or mismatched dates of birth. Such oversights may lead to delays or complications in the petition process, as USCIS relies on this information to verify the credibility of the affidavit. It is crucial to ensure all personal details, such as the full legal names of both the affiant and the petitioners, are accurate and consistent with official documents. Double-checking this information before submission is essential to avoid potential issues. Additionally, using a sample affidavit as a guide can help prevent errors and ensure compliance with legal requirements. Attention to detail is vital to maintain the integrity of the affidavit and support the petition effectively.

Insufficient Detail About the Relationship

Insufficient detail about the relationship is a frequent issue in I-751 affidavits, which can weaken the petition’s credibility. The affiant must provide specific examples and anecdotes that demonstrate their firsthand knowledge of the couple’s relationship. Vague statements, such as “they seem happy,” lack the depth needed to prove the marriage’s legitimacy. Omitting key details, like how the couple met, shared experiences, or ongoing interactions, can raise concerns with USCIS. It is essential to include concrete examples, such as attending events together, frequent communication, or shared responsibilities, to illustrate the couple’s bond. Without sufficient detail, the affidavit may appear unconvincing, potentially leading to requests for additional evidence or delays in processing. Providing a thorough and specific relationship history is critical to supporting the petition effectively.

Submission Process for the I-751 Affidavit

The I-751 affidavit must be submitted alongside Form I-751, typically within 90 days of filing. Ensure the document is notarized and included in the petition package to avoid delays.

When to Submit the Affidavit

The affidavit of friends letter should be submitted at the time of filing Form I-751, Petition to Remove Conditions on Residence. It is essential to include this document in the initial petition package to avoid delays. The affidavit must be submitted within the 90-day window before the conditional green card expires. Missing this deadline can result in complications or denial of the petition. Ensure the affidavit is properly notarized and included with all other supporting evidence. Timely submission is crucial to demonstrate the bona fide nature of the marriage and comply with USCIS requirements. Including it in the initial filing helps avoid the need for additional evidence requests later.

How to Properly File the Document

To properly file the I-751 affidavit, ensure it is submitted alongside Form I-751, Petition to Remove Conditions on Residence. Make a copy of the affidavit for your records before filing. Submit the original notarized document to USCIS at the address listed in the form instructions. Use a trackable delivery method, such as certified mail, to confirm receipt. Include the affidavit in a sealed envelope with all other supporting documents. Failure to file the affidavit with the petition may result in delays or denial. Ensure the document is completed accurately and signed in the presence of a notary public. Proper filing is critical to avoid complications in the removal of conditions process. Always verify the filing address and requirements before submitting.

Conclusion

The I-751 sample affidavit of friends letter is a vital tool in supporting a petition to remove conditions on residency. It provides a sworn statement from friends or family, detailing their knowledge of the marriage’s legitimacy and the couple’s relationship. This letter serves as evidence of the bona fide nature of the marriage, helping to establish credibility in the petition process. It is typically written in a formal tone, including personal information, relationship history, and specific examples to validate the marriage’s authenticity. The affidavit must be notarized and submitted alongside other supporting documents to strengthen the case. It is essential to ensure accuracy and detail to avoid delays or complications in the I-751 process.

the physical death of jesus christ pdf

The physical death of Jesus Christ has sparked intense debate and analysis across medical, theological, and cultural domains. The 1986 JAMA article, On the Physical Death of Jesus Christ, ignited controversy, with protests over its scientific examination of the Gospels. Meanwhile, films like Mel Gibson’s The Passion of the Christ visually depicted the crucifixion, drawing parallels to historical and medical studies. This topic bridges faith, history, and science, offering a profound exploration of Jesus’ death and its enduring impact.

Overview of the Topic

The physical death of Jesus Christ is a subject of profound interest, blending medical, historical, and theological perspectives. The 1986 JAMA article, On the Physical Death of Jesus Christ, sparked widespread debate by examining the crucifixion through a medical lens. This analysis, alongside biblical accounts and Roman crucifixion practices, provides a comprehensive understanding of the event. The topic also explores the physiological effects of crucifixion, shedding light on the cause of Jesus’ death. Additionally, it delves into the theological implications, such as the significance of the resurrection and the atonement theory. Cultural influences, including art, film, and literature, further highlight the enduring impact of this event. By integrating these diverse angles, the discussion offers a holistic view of Jesus’ death, bridging faith, history, and science.

Significance of “The Physical Death of Jesus Christ” PDF

The PDF, stemming from the 1986 JAMA article, bridges medical science and theology, offering a unique perspective on Jesus’ crucifixion. Its significance lies in sparking debates about the intersection of faith and science. The article’s publication led to emotional reactions, with protests over its scientific analysis of biblical accounts. It also influenced popular culture, such as Mel Gibson’s The Passion of the Christ, which visually depicted the crucifixion, aligning with historical and medical insights. The PDF remains a pivotal resource, challenging readers to consider the physiological and theological dimensions of Jesus’ death. Its interdisciplinary approach has made it a cornerstone for discussions on the crucifixion’s authenticity and its cultural impact, ensuring its relevance in both religious and academic circles.

Historical Context

The crucifixion of Jesus is deeply rooted in Roman execution methods, emphasizing public humiliation and pain. Biblical accounts and historical records highlight its brutal efficiency, shaping its enduring historical significance.

Biblical Accounts of Jesus’ Crucifixion

The biblical accounts of Jesus’ crucifixion, as detailed in the four Gospels (Matthew, Mark, Luke, and John), provide a vivid narrative of the events leading to His death. These accounts describe Jesus being nailed to a cross, enduring physical suffering, and ultimately succumbing to death. The Gospels highlight key moments, such as the piercing of His side with a spear and the flow of blood and water, which have been medically interpreted as evidence of cardiac rupture. The crucifixion is portrayed as a divine act of sacrifice, fulfilling Old Testament prophecies. The PDF, On the Physical Death of Jesus Christ, examines these biblical descriptions in light of medical and historical knowledge, offering a unique intersection of faith and science.

Roman Crucifixion Practices

Roman crucifixion was a brutal and public form of execution, designed to deter rebellion and instill fear. Victims were typically nailed or tied to a cross, often after being flogged. The process was slow and agonizing, with the crucified enduring intense pain, dehydration, and asphyxiation. The Romans perfected this method, using vertical and horizontal beams to maximize suffering. Crucifixion was reserved for slaves and non-Romans, emphasizing its dehumanizing nature. The practice was systematic, with soldiers ensuring the victim’s death was prolonged. Historical records and archaeological findings confirm the horrific details of this execution method, which was central to Jesus’ death as described in the Gospels. The 1986 JAMA article and other studies have analyzed the physiological effects of such practices, aligning with biblical accounts of Jesus’ crucifixion.

The 1986 JAMA Article on Jesus’ Death

The 1986 article, On the Physical Death of Jesus Christ, published in the Journal of the American Medical Association (JAMA), sparked significant controversy and debate. Authored by medical professionals, the article provided a detailed analysis of the crucifixion process, examining the physiological effects and likely cause of Jesus’ death. It suggested that asphyxiation, rather than blood loss, was the primary cause of death. The article also explored the medical plausibility of the Gospel accounts, drawing both praise for its scientific rigor and criticism for its perceived challenge to religious beliefs. The publication led to widespread discussions, with some religious groups protesting its release. Despite the backlash, the article remains a landmark study, bridging the gap between medical science and theological narratives surrounding Jesus’ crucifixion.

Medical Analysis

The 1986 JAMA article examined crucifixion’s physiological effects, detailing extreme stress, blood loss, and asphyxiation. Medical experts verified the Gospels’ accounts, concluding crucifixion caused Jesus’ death through cardiac arrest.

Methods of Crucifixion

Crucifixion, as a method of execution, involved severe physical suffering and was designed to prolong death. The Romans typically used a wooden cross, where the victim’s hands and feet were nailed to the structure. This method caused intense pain and led to eventual asphyxiation as the body’s weight strained the diaphragm, making breathing difficult. The cross was often elevated to expose the victim publicly, further humiliating them. Historical accounts and the 1986 JAMA article detail how the nails, often placed in the wrists and ankles, caused significant blood loss and nerve damage. The physical toll of crucifixion was immense, leading to exhaustion, dehydration, and eventual organ failure. These practices were meticulously documented in the JAMA article, providing a medical perspective on the brutality of this ancient execution method.

Physiological Effects of Crucifixion

Crucifixion inflicted extreme physical suffering, leading to severe physiological trauma. The method caused asphyxiation, as the victim’s diaphragm was unable to expand due to the position of the body. Blood loss from nail wounds and flogging led to hypovolemic shock, while the crucifixion itself caused cardiac distress. The weight of the body pulling downward made breathing increasingly difficult, eventually leading to respiratory failure. Additionally, the crucified individual experienced intense pain from nerve damage and muscle fatigue. These physiological effects, combined with dehydration and exposure, accelerated the onset of death. The 1986 JAMA article detailed these medical aspects, providing a scientific perspective on the suffering endured during crucifixion. This analysis aligns with historical accounts, offering a comprehensive understanding of the physical toll of this execution method.

Cause of Death

The primary cause of Jesus’ death was determined to be asphyxia, resulting from the physical strain of crucifixion. Medical analysis suggests that the positioning on the cross led to inadequate breathing, with the diaphragm unable to expand properly. This, combined with hypovolemic shock from blood loss, created a lethal combination. The crucifixion method caused severe trauma, including punctured lungs and a damaged heart, accelerating the process. The 1986 JAMA article highlighted these physiological effects, concluding that the combination of respiratory failure and cardiac arrest was the ultimate cause of death. This medical verification aligns with biblical accounts, providing a scientific explanation for the events described. The study’s findings have been widely referenced, offering a detailed understanding of the physical suffering endured during crucifixion.

Medical Verification of Crucifixion Details

The 1986 JAMA article, On the Physical Death of Jesus Christ, provided a medical analysis of crucifixion practices, verifying details from biblical accounts. It examined the physiological effects of scourging, the placement of nails, and the crucifixion cross’s structure. The study highlighted how prolonged exposure led to asphyxia and hypovolemic shock, aligning with descriptions of Jesus’ death. The article also explored the medical implications of the spear wound to Jesus’ side, confirming its consistency with cardiac tamponade and pericardial effusion. This medical verification bridged historical and scriptural narratives, offering a scientific perspective on the crucifixion’s brutality and its fatal consequences. The analysis remains a cornerstone in discussions about the physical death of Jesus, blending theology with medical science to enhance understanding of this pivotal event.

Theological Implications

The resurrection of Jesus is central to Christian faith, symbolizing victory over death and sin. The atonement theory underscores Jesus’ death as a redemptive act for humanity’s salvation, fulfilling divine purpose.

Significance of Jesus’ Resurrection

The resurrection of Jesus Christ is a cornerstone of Christian theology, symbolizing victory over death and sin. It is seen as a divine affirmation of Jesus’ mission and identity, providing hope for believers. The empty tomb and post-resurrection appearances, as described in the Gospels, are central to this belief. The resurrection underscores the idea of eternal life and redemption, making it a pivotal event in Christian faith. The PDF explores how the physical death of Jesus, verified through historical and medical analysis, lays the foundation for the theological significance of his resurrection. This event continues to inspire faith and spark debate, as seen in discussions surrounding its historical authenticity and spiritual implications. The resurrection remains a powerful symbol of transformation and renewal, deeply influencing Christian doctrine and personal belief systems worldwide.

The Atonement Theory

The Atonement Theory is central to Christian theology, positing that Jesus’ death was a sacrificial act to redeem humanity from sin. His crucifixion, as detailed in the PDF, symbolizes the ultimate act of divine love and forgiveness. The physical suffering Jesus endured, including the medical realities of crucifixion, underscores the gravity of this sacrifice. The theory emphasizes that Jesus’ death was not merely a historical event but a spiritual triumph, offering salvation to all. This doctrine is deeply intertwined with the resurrection, reinforcing the belief in eternal life. The PDF’s medical analysis of Jesus’ death provides a tangible foundation for understanding the theological significance of the Atonement, bridging faith and history.

Cultural Impact

The PDF’s analysis influenced art, film, and literature, sparking debates on Jesus’ death. Mel Gibson’s The Passion of the Christ visually depicted crucifixion, drawing parallels to historical and medical studies, fueling cultural and religious discussions globally.

Art and Symbolism

The physical death of Jesus Christ has profoundly influenced art and symbolism across centuries. Crucifixion scenes, often depicted in paintings and sculptures, emphasize the suffering and redemption central to Christian theology. The cross, a universal symbol of Christianity, represents both death and resurrection. In films like The Passion of the Christ, vivid portrayals of the crucifixion have reinforced its emotional and visual impact. Literary works frequently reference the crucifixion, using it as a metaphor for sacrifice and salvation. These depictions not only reflect historical accounts but also resonate deeply with cultural and spiritual beliefs. The imagery of Jesus’ death continues to inspire artistic expression, bridging the gap between faith and visual storytelling.

Film Depictions

Film depictions of Jesus’ crucifixion have played a significant role in shaping public perception of his death. Mel Gibson’s The Passion of the Christ (2004) is a prime example, vividly portraying the physical suffering and emotional toll of the crucifixion. The film’s release sparked widespread discussion, with many noting its graphic detail and historical accuracy. Rev. Wesley Gabel, who had previously studied Roman crucifixion practices, observed parallels between the film and his research. Such depictions not only highlight the brutality of crucifixion but also emphasize its theological significance. While films like Gibson’s are not documentaries, they serve as powerful tools for engaging audiences with the story of Jesus’ death, blending historical context with emotional resonance. These portrayals continue to influence how people visualize and reflect on the events leading to Jesus’ physical death.

Literary References

The physical death of Jesus Christ has been a recurring theme in literature, inspiring numerous works that explore its theological and historical significance. The 1986 JAMA article, On the Physical Death of Jesus Christ, has been referenced in various literary works, sparking debates about the intersection of faith and science. Literary analyses often delve into the crucifixion’s depiction in biblical narratives, comparing them with medical explanations. Some authors have used the PDF as a source to explore the psychological and physiological aspects of Jesus’ death, while others have critiqued its scientific approach to a deeply religious event. The topic has also appeared in fictional works, where it serves as a backdrop for exploring themes of sacrifice and redemption. These literary references highlight the enduring fascination with Jesus’ death and its multifaceted interpretations across genres and disciplines.

Conclusion

The PDF provides a comprehensive analysis of Jesus’ death, offering medical and theological insights. It has sparked significant dialogue, bridging faith and science in understanding this pivotal event.

Summary of Key Points

The physical death of Jesus Christ, as explored in the PDF, delves into the medical, historical, and theological aspects of His crucifixion. The 1986 JAMA article sparked controversy by examining the Gospels through a scientific lens, while films like The Passion of the Christ visually portrayed the event. Medical analyses highlight the physiological toll of crucifixion, including asphyxiation and blood loss. Theologically, Jesus’ death is central to the doctrine of atonement, while His resurrection remains a cornerstone of Christian faith. Culturally, the crucifixion has inspired countless works of art, literature, and film, cementing its enduring impact. This PDF bridges faith and science, offering a comprehensive understanding of Jesus’ death and its profound significance.

Reflection on the PDF’s Contribution

The PDF, On the Physical Death of Jesus Christ, has significantly contributed to bridging medical science and theology. Its publication in the Journal of the American Medical Association in 1986 sparked widespread debate, challenging traditional religious narratives while offering a scientific lens to understand Jesus’ crucifixion. The document’s meticulous analysis of physiological effects and historical crucifixion practices has made it a cornerstone for interdisciplinary discussions. It not only shed light on the medical aspects of Jesus’ death but also influenced cultural depictions, such as in films like The Passion of the Christ. By provoking both criticism and curiosity, the PDF has become a pivotal resource for scholars, theologians, and the general public, fostering a deeper understanding of the event’s historical and spiritual significance. Its impact continues to resonate, particularly during Easter reflections, where it offers a unique blend of science and faith.