Protection Warriors are formidable tanks with exceptional defensive capabilities, making them ideal for absorbing damage and managing threat. This guide covers the essentials for leveling effectively, including optimal builds, rotations, and strategies to enhance your journey from 1 to 80. Learn how to master your role as a tank while progressing through the levels, ensuring a smooth transition into endgame content.
1.1 Understanding the Role of a Protection Warrior
Protection Warriors are specialized tanks designed to absorb damage and protect allies while managing threat. Their primary role is to hold aggro, mitigate incoming damage, and ensure the survival of their party or raid. With high defensive capabilities, they excel at handling large pulls and maintaining control in combat. While they have lower damage output compared to other Warrior specializations, their ability to survive and protect makes them invaluable in group settings. Understanding your role as a tank is crucial, as it involves positioning, cooldown management, and maintaining threat generation. This foundation is key to mastering the Protection Warrior playstyle, both while leveling and in endgame content.
1.2 Benefits of Leveling as a Protection Warrior
Leveling as a Protection Warrior offers unique advantages, particularly in group settings. Their defensive capabilities allow them to survive challenging content and handle large pulls with ease. By mastering threat generation and aggro management early on, you’ll be well-prepared for tanking in endgame content. Additionally, the high survivability of Protection Warriors makes solo leveling smoother, as they can withstand significant damage. This specialization also teaches essential tanking mechanics, such as cooldown management and positioning, which are invaluable for future raiding or dungeon roles. While Protection may not be the fastest leveling spec, it provides a solid foundation for becoming a skilled tank and enhances your understanding of group dynamics and leadership.
1.3 Preparation for Leveling (Addons, Gear, and Professions)
Before starting your journey as a Protection Warrior, it’s essential to equip yourself with the right tools. Addons like Deadly Boss Mods or Threat Plates can enhance your awareness of threats and enemy mechanics. For gear, prioritize items with stamina and strength to improve survivability and threat generation. Early on, focus on quest rewards and dungeon drops. Professions like Blacksmithing and Jewelcrafting can provide gear enhancements, while Engineering offers utility. These preparations ensure you’re well-equipped to handle the demands of leveling and tanking effectively. A well-prepared Protection Warrior is better positioned to succeed in both solo and group environments.

Leveling Viability and Class Overview
Protection Warriors are highly viable for leveling, offering robust tanking capabilities and strong survivability. They excel at handling multiple enemies and generating threat, making them excellent for grouping. Early levels may feel slower due to limited mobility, but the class shines as it progresses, becoming nearly unkillable with proper gear and cooldown management.
2.1 Is Protection Warrior a Good Choice for Leveling?
Protection Warriors are an excellent choice for leveling due to their high survivability and ability to handle multiple enemies. Their tanking specialization allows them to maintain aggro and protect allies, making them invaluable in groups. While early levels may feel slow due to limited mobility and damage output, the class becomes increasingly powerful as abilities like Shield Block and Shield Wall are unlocked. With proper gear and cooldown management, Protection Warriors can breeze through content, making them a strong and reliable option for leveling. Their durability and utility make them a great choice for both solo and group play, especially for players who enjoy a tanking role.
2.2 Strengths and Weaknesses of Protection Warrior in Leveling
Protection Warriors excel in leveling due to their exceptional survivability and ability to handle multiple enemies. Their strength lies in high health, strong defensive cooldowns, and consistent threat generation, making them ideal for tanking and maintaining aggro. They also benefit from powerful abilities like Shield Bash and Revenge, which enhance their control and damage output. However, their weaknesses include limited mobility and slower damage output compared to other specs. Early levels can feel sluggish due to reliance on melee attacks, and managing rage efficiently can be challenging. Despite these drawbacks, their durability and utility make them a solid choice for leveling, especially when paired with a healer in a group setting.
2.3 Comparison with Other Warrior Specializations
Compared to Arms and Fury, Protection Warriors offer unique advantages in leveling, particularly in tanking and survivability. While Arms focuses on dealing damage and Fury excels at dual-wielding for high DPS, Protection emphasizes defense and crowd control. Arms Warriors struggle with aggro management and durability, making them less suitable for tanking roles. Fury Warriors, on the other hand, lack the defensive capabilities of Protection, relying instead on mobility and burst damage. Protection Warriors, however, excel in group settings, holding aggro effortlessly and protecting allies. Their ability to handle multiple enemies and sustain through heavy damage makes them a top choice for tanking-focused leveling, though they may fall behind in raw damage output compared to other specs;
Best Talent Builds for Leveling
Optimized talent builds for Protection Warriors at each leveling phase, focusing on survivability and threat generation, ensuring effectiveness in both solo and group play scenarios.
3.1 Talent Build for Levels 1-20
For levels 1-20, focus on survivability and early threat generation. Start with Shield Mastery to increase block chance, and Deflection for improved parry. Invest in Anticipation to boost stamina. Take Improved Shield Block to enhance your primary defensive tool. Early points in Shield Bash and Thunder Clap help with crowd control and threat. Prioritize talents that reduce damage taken, as survivability is key. Avoid damage-focused talents initially, as threat generation will come naturally with proper ability usage. This build ensures you can handle early dungeons and quests effectively while building a strong foundation for later levels.
3.2 Talent Build for Levels 20-40
At levels 20-40, focus on enhancing survivability and improving threat generation. Invest in Shield Mastery and Deflection for better defensive stats. Take Taunt to manage aggro effectively in dungeons. Demoralizing Shout and Improved Thunder Clap are crucial for controlling mobs and generating threat. Allocate points to Anticipation for increased stamina and Improved Shield Block to reduce damage during intense fights. Prioritize talents that enhance your ability to hold aggro while maintaining survivability. Avoid over-investing in damage-focused talents, as threat generation becomes more manageable at this stage. This build ensures you can tank dungeons confidently and progress smoothly through the levels.
3.3 Talent Build for Levels 40-60
From levels 40-60, focus on refining your tanking capabilities and improving survivability. Invest in Shield Wall and Last Stand for emergency survivability tools. Improved Shield Block enhances your ability to mitigate damage during critical moments. Allocate points to Concussion Blow for crowd control and Improved Hamstring to slow enemies, reducing damage taken. Glyph of Shield Wall and Glyph of Last Stand further bolster your defensive capabilities. Prioritize talents that enhance stamina, reduce damage intake, and improve rage generation. This build ensures you can handle higher-level mobs and dungeons effectively while maintaining a strong defensive presence. Balance survivability with threat generation to remain a reliable tank for your group.
3;4 Talent Build for Levels 60-80
From levels 60-80, focus on maximizing survivability and threat generation. Invest in Warrior’s Vigilance to boost your threat and reduce damage taken. Shield Mastery improves block chance and critical block chance, enhancing mitigation. Allocate points to Gag Order for improved interrupt capabilities and Improved Disarm to reduce enemy damage output. Damage Shield increases damage absorbed, while Hold the Line provides additional parry chance. Vitality boosts stamina and health, making you more durable. Field Marshal enhances your leadership abilities, benefiting your group. Second Wind improves health regeneration, aiding in long encounters. This build ensures you remain a formidable tank with strong defensive and offensive capabilities, excelling in both solo and group content.
3.5 Talent Build for Levels 80-85 (if applicable)
At levels 80-85, focus on refining your tanking capabilities for endgame content. Invest in Warrior’s Vigilance to enhance threat generation and reduce damage taken. Shield Mastery remains crucial for increased block chance and critical blocks. Gag Order improves interrupt functionality, while Improved Disarm further reduces enemy damage output. Damage Shield and Hold the Line enhance survivability through damage absorption and parry chance. Vitality boosts stamina and health, and Field Marshal improves leadership abilities for group benefits. This build ensures you are well-prepared for raiding and tanking at level 85, with a strong emphasis on survivability and control. It maintains a balance between defense and offensive capabilities, making you a reliable tank for endgame content.

Rotation and Ability Usage
A Protection Warrior’s rotation focuses on generating and maintaining threat while mitigating damage. Use Shield Slam and Revenge as primary attacks, and Shockwave for crowd control. Shield Block and Shield Wall provide defensive cooldowns, while Demoralizing Shout reduces enemy damage. Manage rage efficiently to sustain your rotation and maintain aggro. This approach ensures effective tanking and survivability during leveling.
4.1 Basic Rotation for Early Levels
At early levels, a Protection Warrior’s rotation focuses on generating threat and surviving. Start with Charge to close the gap, then use Shield Slam and Revenge to build aggro. Include Thunder Clap to slow enemies and maintain control. Use Shield Block to mitigate damage spikes and Shield Wall in emergencies. Demoralizing Shout reduces enemy damage, aiding survivability. Keep Heroic Strike for excess rage. This rotation ensures consistent threat and survivability while leveling through the early stages.
- Use Charge to initiate combat.
- Follow up with Shield Slam and Revenge for threat.
- Apply Thunder Clap to slow and control mobs.
- Activate Shield Block during heavy damage phases.
- Use defensive cooldowns like Shield Wall when needed.
4.2 Advanced Rotation for Higher Levels
At higher levels, the Protection Warrior rotation becomes more refined, balancing threat generation and survivability. Continue using Shield Slam and Revenge as primary attacks, but incorporate Thunder Clap for crowd control and Shield Block during heavy damage phases. At level 40, Spell Reflection becomes available, allowing you to reflect spells and enhance threat. Use Shattering Blow to stun and interrupt casters. Integrate Heroic Strike for additional damage when rage permits. This advanced rotation optimizes damage intake while maintaining high threat, making you a formidable tank as you progress through higher levels.
- Prioritize Shield Slam and Revenge for consistent threat.
- Use Thunder Clap to manage multiple enemies.
- Activate Shield Block during intense damage periods.
- Utilize Spell Reflection to counter spellcasters.
- Incorporate Shattering Blow for crowd control.
4.3 Cooldown Management During Leveling
Effective cooldown management is crucial for a Protection Warrior to maintain survivability and threat during leveling. At higher levels, abilities like Shield Wall and Last Stand become essential for managing heavy damage. Use Shield Wall during intense fights to reduce incoming damage, and Last Stand to quickly recover health; Shield Block should be used strategically to mitigate large hits. Additionally, Revenge and Thunder Clap help maintain aggro while controlling enemy movements. Properly timing these cooldowns ensures smoother progression and better tanking performance.
- Use Shield Wall to reduce damage during critical moments.
- Activate Last Stand for emergency health recovery.
- Employ Shield Block to absorb heavy attacks.
- Utilize Revenge and Thunder Clap for consistent threat and crowd control.

Gear and Equipment for Leveling
Focus on gear with Stamina and Strength for survivability. Prioritize Armor from quests and dungeons. Use professions like Blacksmithing or Jewelcrafting to craft early gear upgrades.
5.1 Best Stats for a Protection Warrior
For a Protection Warrior, prioritizing the right stats is crucial for effective tanking and survivability. Stamina is your highest priority, as it increases your health pool, allowing you to absorb more damage; Strength is next, enhancing your attack power and block value, which are vital for generating threat and mitigating damage. Armor is also essential, as it directly reduces incoming damage. Additionally, Dodge and Parry become more valuable at higher levels, improving your ability to avoid or block attacks. While Hit and Expertise are less critical for tanking, they still play a role in maintaining consistent threat generation.
5.2 Early Game Gear Priorities
During the early levels, focus on acquiring gear that provides a balance of armor, stamina, and strength. These stats are crucial for survivability and threat generation. Prioritize items with high armor and stamina to increase your health pool, while also seeking weapons with high DPS to improve your attack power. Key pieces to look for include sturdy chestplates, shoulder armor, and gloves, as these provide significant defensive benefits. Additionally, consider equipping gear with block or dodge bonuses to enhance your ability to mitigate damage. Quest rewards and dungeon drops are excellent sources for early-game gear. Always aim to upgrade your gear as you progress through zones to maintain a strong defensive foundation.
5.3 Mid-Game Gear Upgrades
Mid-game gear upgrades are essential for maintaining your effectiveness as a Protection Warrior. Focus on enhancing your armor, strength, and stamina to improve survivability and threat generation. Key pieces to upgrade include your chestplate, helmet, and gloves, as these provide significant defensive bonuses. Seek items with block and dodge ratings to further boost your mitigation capabilities. Dungeons like Stratholme and Scholomance offer excellent mid-game gear options. Additionally, consider crafting or purchasing gear through professions such as Blacksmithing or Jewelcrafting. Enchant your gear with stamina or strength-boosting enchants to maximize your stats. Upgrading your shield is also crucial, as it significantly impacts your ability to block and absorb damage effectively. Prioritizing these upgrades will ensure you remain a formidable tank throughout the mid-game levels.
5.4 Endgame Gear for Level 80
At level 80, acquiring endgame gear is crucial for optimizing your Protection Warrior’s performance. Focus on items with high Stamina, Strength, and Avoidance to enhance survivability and threat generation. Key pieces include the Valorous Siegeplate set from Ulduar, which provides exceptional defensive stats. Accessories like the Ring of the Valiant and Pendant of the Argent Crusade also offer significant bonuses. Prioritize gear with high block value and shield block rating to improve your ability to mitigate damage. Enchant your gear with stamina or strength-boosting enchants, and gem for Stamina and Strength to further enhance your stats. Crafting items through professions like Blacksmithing can also provide powerful endgame alternatives. Ensuring your gear is well-optimized will make you a formidable tank for raids and heroics.

Professions and Their Impact on Leveling
Professions like Blacksmithing, Engineering, and Jewelcrafting provide significant advantages for Protection Warriors, offering gear enhancements and stat boosts that improve survivability and threat generation during leveling.
6.1 Best Professions for a Protection Warrior
For Protection Warriors, Blacksmithing and Engineering are highly recommended professions. Blacksmithing allows crafting powerful gear and adding sockets, enhancing survivability. Engineering provides unique gadgets like shields and buffs, improving utility. Jewelcrafting is also beneficial for creating high-quality gems to boost stats. These professions complement the tank role, offering survivability and threat generation advantages. They are ideal for smoothing the leveling process and preparing for endgame content. Each profession brings distinct benefits, making them valuable choices for a Protection Warrior focused on tanking and durability.
6.2 How Professions Can Aid in Leveling
Professions significantly enhance leveling efficiency for Protection Warriors by providing essential resources and gear. Blacksmithing enables crafting sturdy armor and weapons, reducing downtime between fights. Engineering offers utility tools like explosive devices and temporary shields, aiding in tough situations. Jewelcrafting allows for powerful gems to boost stats, improving survivability and threat generation. These professions ensure consistent upgrades, reducing reliance on drops. Additionally, they provide gold through crafting items for other players. By leveraging professions, warriors maintain better gear and adaptability, making leveling smoother and more efficient. This self-sufficiency is crucial for tanking effectively and progressing through challenging content without delays.
6.3 Crafting Gear for Early and Mid-Levels
Crafting gear for early and mid-levels as a Protection Warrior can significantly enhance your leveling experience by providing tailored equipment that meets your specific needs. Professions like Blacksmithing allow you to craft durable armor and weapons, ensuring you have reliable gear as you progress through the early stages. Engineering offers utility items such as explosive devices and temporary shields, which can aid in tough combat situations. Jewelcrafting enables the creation of powerful gems to boost your stats, improving both survivability and threat generation. These crafted items can often surpass the quality of loot found during questing or in dungeons, reducing downtime and making fights less challenging. Additionally, crafting provides a sense of self-sufficiency, allowing you to maintain better gear without relying on drops. However, it’s important to balance crafting with leveling progression to avoid slowing down your advancement. The long-term benefits of crafting become more apparent at higher levels, where optimized gear is crucial for raiding and tanking roles. By carefully selecting professions that complement your tanking role and investing time in crafting, you can create a robust set of gear that supports your journey from the early to mid-levels and beyond.

Leveling Strategies and Tips
Mastering aggro management, using cooldowns effectively, and maintaining a balanced rotation are key to efficient leveling as a Protection Warrior. Prioritize ability upgrades and optimize threat generation to minimize downtime and ensure smooth progression through zones and dungeons.
7.1 Grouping vs Solo Leveling
Grouping and solo leveling each offer unique advantages for a Protection Warrior. Grouping allows for shared experience, faster dungeon runs, and better loot distribution, while solo leveling provides more control over pacing and quest efficiency. Protection Warriors excel in both scenarios due to their tanking capabilities, making them versatile. In groups, they can focus on managing aggro and protecting allies, while soloing enables them to handle multiple enemies with ease. However, solo leveling may require more careful cooldown management to maintain survivability. Ultimately, the choice depends on preference, as both methods are viable and effective for leveling a Protection Warrior efficiently.
7.2 Managing Aggro and Threat
Managing aggro and threat is crucial for a Protection Warrior during leveling, as maintaining control of enemy attention ensures survivability and efficient progression. Abilities like Thunder Clap and Shield Slam are essential for generating initial threat, while Recklessness can provide a burst of threat generation in challenging situations. Using Shield Block and Spell Reflection strategically helps mitigate damage and maintain aggro. Keeping a consistent rotation and prioritizing threat-generating abilities ensures enemies remain focused on the warrior, allowing for smoother combat experiences. Proper aggro management also reduces the risk of enemies targeting weaker party members, making the Protection Warrior a reliable tank during both solo and group leveling scenarios.
7.3 Utilizing Abilities for Efficient Leveling
Utilizing abilities effectively is key to efficient leveling as a Protection Warrior. Use Heroic Strike and Shield Slam to deal consistent damage while generating threat. Thunder Clap helps control multiple enemies, reducing damage taken. Incorporate Recklessness for burst damage phases and Shield Block to mitigate heavy hits. Spell Reflection can counter caster enemies, while Intervene aids in managing adds or helping allies. Prioritize abilities that balance damage output with survivability, ensuring smooth progression. By integrating these skills into your rotation, you maintain control, minimize downtime, and optimize leveling speed. Proper ability usage enhances both solo and group leveling efficiency, making the Protection Warrior a formidable and versatile class.

Level-by-Level Progression
Adapt your playstyle as you progress through levels, unlocking key abilities like Shield Slam and Thunder Clap to enhance survivability and aggro management, ensuring smooth progression.
8.1 Leveling from 1-20
Leveling a Protection Warrior from 1-20 focuses on mastering basic tanking mechanics and survivability. Start with a one-handed weapon and shield for optimal defense. At level 1, Shield Bash and Thunder Clap provide early crowd control. Use Charge to close gaps and Hamstring to slow enemies. Focus on stamina and armor for survivability. At level 10, unlock Shield Slam, enhancing threat generation. By level 15, incorporate Revenge for damage and aggro. Grouping with a healer simplifies dungeon runs. Prioritize early gear with armor and stamina. Use cooldowns like Shield Block judiciously for tougher enemies. This foundation sets you up for smooth progression in later levels.
8.2 Leveling from 20-40
Leveling from 20-40 as a Protection Warrior builds on earlier foundations, enhancing survivability and threat generation. At level 20, Shield Slam becomes a key ability, integrating into your rotation for consistent damage and aggro. By level 30, Revenge and Devastate improve your offensive capabilities. Focus on stamina and armor to maintain durability. Grouping with healers and DPS in dungeons simplifies progression. At level 40, Shield Block and Shield Bash refine your defensive toolkit. Prioritize quest rewards and dungeon drops for gear upgrades, especially items with stamina and strength. Managing cooldowns and ability usage ensures smooth leveling. This phase solidifies your tanking role, preparing you for higher-level challenges.
8.3 Leveling from 40-60
Leveling from 40-60 as a Protection Warrior introduces new tools to enhance survivability and threat generation. At level 50, Shield Wall and Last Stand provide critical survivability during intense fights. Focus on increasing stamina and strength to maintain aggro and endure damage. Quest rewards and dungeon drops become more impactful, with gear prioritizing stamina and armor. Grouping for dungeons remains efficient, as your tanking role becomes more refined. By level 60, your rotation includes advanced abilities like Shield Slam and Revenge, ensuring consistent threat. Managing cooldowns like Shield Block is key for smoother progression. This phase prepares you for the challenges of endgame content with a solid foundation in tanking mechanics.
8.4 Leveling from 60-80
Leveling from 60-80 as a Protection Warrior focuses on refining your tanking role and leveraging new abilities like Shockwave and Spell Reflection. At level 70, Shield Slam becomes a core part of your rotation, enhancing threat generation. Gear prioritize stamina, strength, and armor, with dungeon and raid drops offering significant upgrades. Grouping remains efficient, especially in high-level dungeons, where your tanking expertise shines. By level 80, your survivability and cooldown management are optimized, preparing you for endgame content. Focus on maintaining aggro and using abilities like Shield Wall and Last Stand to handle challenging encounters. This phase solidifies your role as a reliable tank, ready for the demands of raiding and high-level dungeons.

Endgame Preparation
Endgame preparation focuses on transitioning to raiding, building a raid-ready set, and refining talents for optimal tanking performance.
9.1 Transitioning to Raiding and Tanking
Transitioning to raiding and tanking requires refining your rotation and ability usage for maximum threat generation and survivability. Focus on mastering cooldown management to handle high incoming damage. Learn raid mechanics and positioning to minimize unnecessary damage taken. Acquire raid-appropriate gear, emphasizing stamina and mitigation stats. Practice maintaining aggro on multiple targets and improve your awareness of raid dynamics. Consider running dungeons to refine your skills in a group setting. Build confidence in your tanking abilities by communicating with healers and DPS. This preparation ensures a smooth transition from leveling to endgame content.
- Master cooldowns for survivability.
- Learn raid mechanics and positioning.
- Acquire raid-ready gear.
- Practice aggro management.
- Communicate with your team.
9.2 Building a Raid-Ready Set
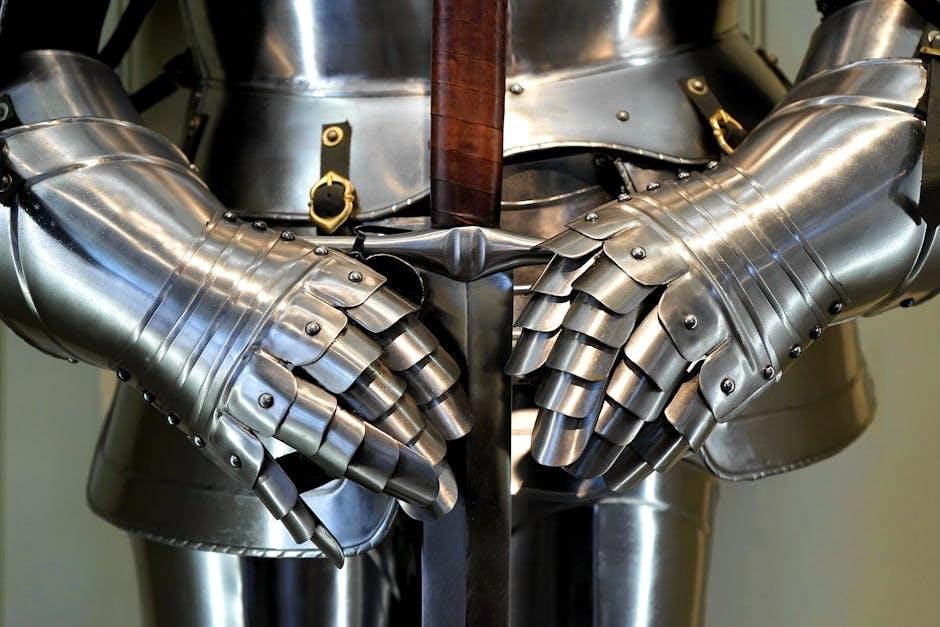
Building a raid-ready set for a Protection Warrior focuses on maximizing survivability and threat generation. Prioritize gear with high stamina, defense, and dodge ratings to ensure durability. Aim for a balanced set with a mix of epic and crafted items, such as _tensorio’s chestplate or reckless gladiator’s armor. Enchant and gem your gear to boost stamina, armor, and mitigation stats. Use professions like Blacksmithing or Jewelcrafting to craft key pieces. Run heroics and participate in raids to acquire set pieces. Reforge gear to meet defense and hit caps for optimal performance. A well-rounded set ensures you can handle the demands of raid tanking while maintaining aggro and survivability in high-end content.
- Prioritize stamina and defense stats.
- Enchant and gem for survivability.
- Craft or acquire epic gear pieces.
- Reforge to meet stat caps.
9.3 Final Adjustments to Talent Builds
Once reaching level 80, finalize your Protection Warrior talent build to optimize for raid tanking. Ensure your talents focus on survivability, threat generation, and cooldown management. Re-evaluate your glyph choices, prioritizing Major Glyphs like Shield Wall and Shield Block for enhanced defensive capabilities. Consider tweaking talent points to maximize Critical Block Chance and Damage Reduction; Dual-spec into a DPS build if desired, but keep your tank build refined. Review your talent distribution to ensure it aligns with your raid role, balancing survivability with aggro maintenance. Practice rotation adjustments to complement your final build in heroics or raids to ensure seamless performance.
- Optimize talents for survivability and threat.
- Refine glyphs for raid-specific needs.
- Ensure talents align with your raid role.
- Practice rotation adjustments.
