Converting a Nissan 240sx from automatic to manual is a popular modification, offering enhanced driver control and a more engaging experience․ This guide details the process․
Overview of the Swap
The 240sx manual transmission swap fundamentally alters the driving experience, replacing the convenience of automatic operation with the direct control favored by enthusiasts․ This conversion typically involves sourcing a complete manual transmission assembly – often from another 240sx, or utilizing options like the CD009 from the 350Z/370Z․
Beyond the transmission itself, the swap necessitates a clutch kit, flywheel, modified or replacement driveshaft, a compatible transmission mount, and potentially ECU adjustments or a standalone wiring harness․ The process, while achievable for skilled DIY mechanics, demands a significant time investment – estimates range from 8 to 12 hours – and a comprehensive understanding of automotive systems․ Successful completion yields a more responsive and enjoyable driving experience․
Why Swap to a Manual Transmission?
The primary motivation for a 240sx manual swap is enhanced driver engagement and control․ Manual transmissions allow for precise gear selection, fostering a more connected feel with the vehicle and the road․ This is particularly appealing for those interested in drifting, track days, or spirited driving, where precise control is paramount․
Furthermore, a manual swap often unlocks additional performance potential․ Eliminating the torque converter losses inherent in automatic transmissions can result in improved acceleration and efficiency․ Many enthusiasts also prefer the simplicity and reliability of a manual system, reducing potential maintenance complexities․ Ultimately, the swap transforms the 240sx into a more driver-focused machine, catering to a specific driving style and preference․

Parts Required for the Swap
Essential components include a transmission, clutch kit, flywheel, driveshaft (potentially modified), mount, wiring harness, and potentially an ECU for compatibility․
Transmission Options (S13, S14, CD009)

Several transmission options exist for a 240sx manual swap, each with its own advantages․ The S13 transmission is a direct fit, simplifying the process, but gear ratios may not be ideal for all applications․ S14 transmissions offer slightly taller gearing, potentially improving highway cruising․ However, they require a different transmission mount and may necessitate driveshaft modifications․
The CD009 transmission, sourced from the 350Z or 370Z, is a popular upgrade due to its robust construction and modern gear ratios․ This option typically requires a bellhousing adapter kit, like the A340 kit, to mate with the 240sx engine․ While offering superior strength and feel, the CD009 swap is generally more complex and expensive than using an S13 or S14 transmission․
Clutch Kit Selection
Choosing the right clutch kit is crucial for a successful 240sx manual swap․ Consider your power goals and driving style․ A stock replacement clutch is suitable for mildly modified engines and daily driving․ For increased power, a performance clutch with a stronger pressure plate and upgraded disc is recommended․
Ceramic clutches offer high clamping force and heat resistance, ideal for aggressive driving and high-horsepower applications, but can be harsh for street use․ Consider the clutch disc material; organic discs provide smooth engagement, while metallic discs offer increased grip․ Ensure the kit includes a throw-out bearing and pilot bearing for a complete installation․ Proper lubrication during installation is also essential for longevity․
Flywheel Considerations
The flywheel is a critical component during a 240sx manual swap, impacting clutch performance and engine balance․ Matching the flywheel to your chosen transmission and clutch is essential․ Lightweight flywheels reduce rotational inertia, improving engine responsiveness but potentially making the car more difficult to drive smoothly at low speeds․
Stock flywheels are a cost-effective option for mild builds, while aftermarket flywheels offer various weights and materials․ Ensure the flywheel is properly balanced to prevent vibrations․ Inspect the flywheel surface for damage or wear before installation; resurfacing or replacement may be necessary․ Using the correct flywheel bolts and torque specifications is vital for safe and reliable operation․
Driveshaft Modifications or Replacement
The driveshaft often requires modification or complete replacement during a 240sx manual transmission swap, as the lengths differ between automatic and manual setups․ Carefully measure the distance between the transmission output shaft and the differential input yoke to determine the necessary driveshaft length․
Depending on the transmission chosen (S13, S14, or CD009), a custom driveshaft may be required․ Some swaps can utilize a modified stock driveshaft, but ensuring proper length and balance is crucial․ A driveshaft that is too long or too short can cause vibrations or damage to the transmission or differential․ Professional driveshaft shortening or fabrication is recommended for optimal results and safety․
Transmission Mount and Bracket
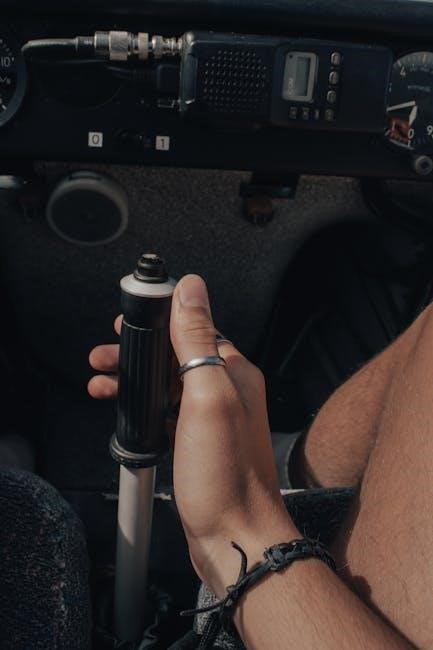
A crucial component of the swap is the transmission mount and bracket, as the manual transmission utilizes a different mounting point than the automatic․ Often, the original automatic transmission mount will not be compatible․ Sourcing a correct mount specifically designed for the manual transmission and 240sx chassis is essential․
Several aftermarket options are available, or you may be able to adapt a mount from a similar Nissan vehicle․ Ensure the mount is robust enough to handle the transmission’s weight and the stresses of driving․ Proper alignment of the transmission is vital to prevent vibrations and ensure smooth operation․ Verify the bracket securely fastens to the chassis and supports the transmission effectively․
Wiring Harness and ECU Compatibility
Integrating the manual transmission requires addressing wiring harness modifications and ECU compatibility․ The automatic transmission sends signals to the ECU regarding gear selection; these signals are no longer needed with a manual setup․ You may need to modify the wiring harness to remove or disable these connections, preventing error codes․

Furthermore, some ECUs may require reprogramming to fully support a manual transmission․ Specifically, the S13 ECU might need adjustments․ An S14 manual speed sensor may be necessary if using an S13 transmission․ Carefully review wiring diagrams and consult resources specific to your ECU and transmission combination to ensure proper functionality and avoid potential issues․
Tools Needed for the Swap
Successful completion demands standard hand tools, alongside specialized equipment like a flywheel holder and clutch alignment tool for precise installation and adjustments․
Essential Hand Tools
A comprehensive set of hand tools is fundamental for a smooth 240sx manual transmission swap․ This includes metric socket sets (8mm-19mm), wrenches, and ratchets – both 1/4” and 3/8” drive are beneficial․ You’ll need various screwdrivers (Phillips and flathead) for interior disassembly and wiring connections․ Pliers, including needle-nose and locking pliers, are crucial for hose clamps and tight spaces․
Torque wrenches are absolutely essential for properly tightening bolts to manufacturer specifications, especially for the flywheel and driveshaft․ A breaker bar will assist in loosening stubborn bolts․ Don’t forget a hammer (rubber mallet and standard) for gentle persuasion and removing stuck components; Finally, penetrating oil will be your best friend when dealing with rusted or corroded fasteners․
Specialized Tools (Flywheel Holder, Clutch Alignment Tool)
Beyond standard hand tools, several specialized tools are vital for a successful 240sx manual transmission swap․ A flywheel holder is non-negotiable; it secures the flywheel while torquing the crankshaft bolt, preventing engine rotation․ A clutch alignment tool is equally crucial, ensuring the clutch disc is perfectly centered during installation, preventing difficulty engaging gears later․
Consider a transmission jack for safely lifting and positioning the manual transmission․ While not strictly essential, it significantly eases the process․ A slide hammer can be helpful for removing stubborn pilot bearings․ Having a magnetic pickup tool is useful for retrieving dropped bolts in hard-to-reach areas․ These specialized tools streamline the swap and minimize potential damage․

Step-by-Step Swap Procedure
Begin by removing the automatic transmission, then install the manual transmission, carefully aligning and bolting it in place․ Finally, connect the driveshaft and wiring․
Removing the Automatic Transmission
Initiate the removal process by draining the automatic transmission fluid (ATF) completely․ Disconnect the driveshaft at the differential, typically involving four bolts; Carefully detach the shift linkage and any electrical connectors attached to the transmission․ Support the engine from above to prevent it from tilting when the transmission is removed․
Next, remove the finisher plate and center console for access․ Unbolt the transmission mount and bracket, providing necessary support to the transmission as it becomes free․ Slowly lower the automatic transmission, ensuring no wires or hoses remain connected․ This step requires patience and attention to detail to avoid damaging any components․ Remember to label all disconnected parts for easier reassembly or installation of the manual transmission․
Installing the Manual Transmission
Begin by aligning the manual transmission with the engine, ensuring the input shaft is properly centered․ Carefully raise the transmission into position, supporting its weight throughout the process․ Bolt the transmission securely to the engine, tightening the bolts to the manufacturer’s specified torque․
Then, install the new transmission mount and bracket, ensuring proper alignment and secure fastening․ Reconnect the driveshaft, verifying correct engagement with the differential․ Attach the shift linkage, making preliminary adjustments for smooth gear selection․ Finally, reconnect all electrical connectors, double-checking for secure connections․ This stage demands precision and attention to detail for optimal performance and reliability․
Driveshaft Installation and Adjustment
After the transmission is mounted, carefully install the driveshaft, ensuring it slides smoothly into the differential flange․ Secure the driveshaft with the appropriate bolts, tightening them to the correct torque specification․ Verify proper alignment between the transmission output shaft and the differential input yoke; any misalignment can cause vibrations․
Next, check the driveshaft’s length and adjust if necessary․ A driveshaft that is too long or too short can damage the transmission or differential․ Inspect the U-joints for wear or play, replacing them if needed․ Finally, confirm the driveshaft spins freely without binding, ensuring smooth power delivery․ Proper driveshaft installation is crucial for a reliable swap․
Wiring and ECU Integration
Integrating the manual transmission requires connecting the appropriate wiring for the reverse light switch and the vehicle speed sensor (VSS)․ The VSS signal is crucial for accurate speedometer readings and proper ECU function․ Depending on the transmission and ECU, you may need to modify or repin wires in the harness․
Ensure the ECU recognizes the manual transmission; some ECUs require reprogramming or a different calibration․ Verify all connections are secure and properly insulated to prevent shorts․ A faulty connection can lead to erratic behavior or damage to the ECU․ Double-check wiring diagrams and consult resources specific to your setup for accurate integration․

Potential Issues and Troubleshooting
Common problems include shifter misalignment, clutch pedal adjustment difficulties, and unusual transmission noises; careful diagnosis and adjustment are often required for a smooth operation․

Shifter Alignment Problems
Incorrect shifter alignment is a frequent issue during a 240sx manual swap, manifesting as difficulty selecting gears or a vague, imprecise shifting feel․ This often stems from improper installation of the shifter assembly or a mismatch between the transmission and shifter components․ Carefully check the shifter base plate’s positioning and ensure it’s securely fastened․ Verify that the shift linkage is correctly connected and free of binding․
Sometimes, slight adjustments to the linkage rods are necessary to achieve optimal alignment․ Inspect the rubber bushings within the linkage for wear or damage, as these can contribute to slop and imprecise shifting․ If using an aftermarket shifter, consult the manufacturer’s instructions for specific alignment procedures․ Addressing these issues will dramatically improve the driving experience․
Clutch Pedal Adjustment
Proper clutch pedal adjustment is crucial for a smooth and reliable manual transmission swap in a 240sx․ Incorrect adjustment can lead to issues like difficulty shifting, clutch slippage, or a pedal that feels too high or too low․ Begin by ensuring the clutch master cylinder is correctly installed and bled to remove any air from the system․
Adjust the clutch pedal’s free play – the distance the pedal moves before engaging the clutch – according to the manufacturer’s specifications, typically around 10-15mm․ This ensures complete clutch disengagement without excessive wear․ Carefully monitor for proper engagement point and smooth operation․ Fine-tuning may be required after initial setup and break-in period․
Transmission Noise
Following a 240sx manual transmission swap, unusual noises can sometimes occur, requiring careful diagnosis․ Common sources include worn throw-out bearings, manifesting as a squealing or chirping sound when the clutch pedal is depressed․ Internal transmission gear noise, like whining or grinding, could indicate damaged gears or bearings within the gearbox itself․
Check the transmission fluid level and condition; low or contaminated fluid can exacerbate noise․ Inspect the driveshaft for imbalances or worn U-joints, as these can transmit vibrations and sounds․ If persistent noise exists, professional inspection is recommended to prevent further damage and ensure safe operation of the swapped transmission․