LifeSmart Infrared Heater: A Comprehensive Instruction Manual Guide
Welcome! This guide provides essential instructions for your LifeSmart Infrared Heater, ensuring safe and efficient operation․ Explore detailed setup, controls, and troubleshooting steps today!
Access archived manuals and resources via the embedded link, offering supplementary information for your heating experience․
Understanding Your LifeSmart Infrared Heater
How it Works: Your LifeSmart Infrared Heater utilizes radiant heating technology, directly warming objects and people rather than the air․ This provides a more efficient and comfortable heating experience, especially in targeted areas․ Unlike traditional heaters, infrared heat isn’t affected by drafts, offering consistent warmth․
Key Components: The heater consists of infrared elements, a control panel (or remote receiver), a power cord, and potentially smart connectivity features․ Understanding these components is crucial for proper operation and maintenance․ The housing is designed for durability and safety, ensuring long-lasting performance․
Radiant vs․ Convection: It’s important to differentiate between radiant and convection heating․ Convection heaters warm the air, which then warms objects․ Radiant heaters, like yours, provide direct warmth, minimizing energy waste and creating a more focused heating solution․ This makes it ideal for personal comfort or spot heating within a larger space․
Refer to archived resources for detailed diagrams and component explanations․
Key Features and Benefits
Efficient Heating: Experience rapid and focused warmth with infrared technology, directly heating you and objects, reducing energy waste compared to traditional heaters․ Enjoy cost-effective heating solutions for your home or office․
Smart Control: Many LifeSmart heaters offer app control and voice assistant compatibility (if applicable), allowing remote operation and scheduling for ultimate convenience․ Integrate seamlessly into your smart home ecosystem․
Safety First: Built-in safety features like overheat protection and tip-over switches ensure worry-free operation․ The cool-touch exterior minimizes burn risks, making it safe for households with children or pets․
Portable Design: Lightweight and compact, the heater is easily moved from room to room, providing targeted warmth where you need it most․ Enjoy versatile heating solutions throughout your living space․
Explore archived manuals for specific feature details related to your model․

Safety Precautions – Important Information
Read all instructions carefully before operating your LifeSmart Infrared Heater․ Never use the heater near flammable materials, water, or in bathrooms․ Maintain a safe distance of at least 3 feet from furniture and curtains․
Always plug the heater directly into a wall outlet; do not use extension cords or power strips․ Inspect the power cord regularly for damage and discontinue use if any are found․ Unplug the heater when not in use and during cleaning․
Never cover the heater or obstruct the air intake/outlet․ Do not operate with a damaged cord or plug․ This heater is intended for indoor use only․ Supervise children and pets around the heater at all times․
Refer to archived manuals for detailed safety guidelines specific to your model․
Package Contents – What’s Included
Your LifeSmart Infrared Heater package should include the following items․ Please verify all components are present before proceeding with setup․ The package contains: One (1) LifeSmart Infrared Heater unit, carefully packaged for protection during transit․

Additionally, you will find: One (1) Remote Control (batteries may or may not be included – check packaging), One (1) Instruction Manual (this document!), and Four (4) Stabilizing Feet for secure placement․ Depending on the model, you may also receive a mounting bracket and associated hardware․
If any items are missing or damaged, do not operate the heater․ Contact customer support immediately for assistance and replacement parts․ Refer to archived resources for potential component diagrams․
Setting Up Your LifeSmart Heater
Before you begin, ensure you have all package contents verified (see previous section)․ Choose a location for your heater that is stable, level, and away from flammable materials – maintain at least 3 feet of clearance․ Attach the stabilizing feet to the base of the heater, ensuring they are securely fastened․
If you intend to wall-mount the heater (if your model supports this), carefully follow the mounting bracket instructions․ Do not place the heater near water sources or in areas with high humidity․ Ensure the power cord will reach a grounded electrical outlet without being a tripping hazard․
Review archived diagrams for visual guidance on component placement and assembly․ Proper setup is crucial for safe and efficient operation․
Initial Setup and Placement Guidelines

Optimal placement maximizes heating efficiency․ Position the heater to directly warm occupants, rather than aiming at empty space․ Avoid obstructions like furniture or curtains that may block heat distribution․ For room-wide heating, a central location is generally best․
Ensure adequate ventilation around the heater to prevent overheating․ Do not place it directly under electrical outlets or near easily flammable items like paper or fabrics․ Consider the heater’s infrared properties – direct line of sight is key for effective warmth;
Refer to archived resources for suggested placement scenarios based on room size and layout․ Initial setup significantly impacts performance and safety․
Connecting to Power – A Step-by-Step Guide
Step 1: Verify the voltage indicated on the heater’s base matches your household power supply․ Step 2: Locate a grounded electrical outlet capable of handling the heater’s wattage․ Avoid using extension cords or power strips whenever possible; direct connection is safest․
Step 3: Ensure the power switch is in the “OFF” position before plugging in the heater․ Step 4: Firmly insert the power plug into the outlet․ You should hear a click confirming a secure connection․ Step 5: If the heater doesn’t power on, double-check the outlet’s functionality with another device․
Consult archived manuals for specific power requirements and safety warnings․ Proper connection prevents electrical hazards and ensures optimal heater operation․
Operating Your LifeSmart Heater
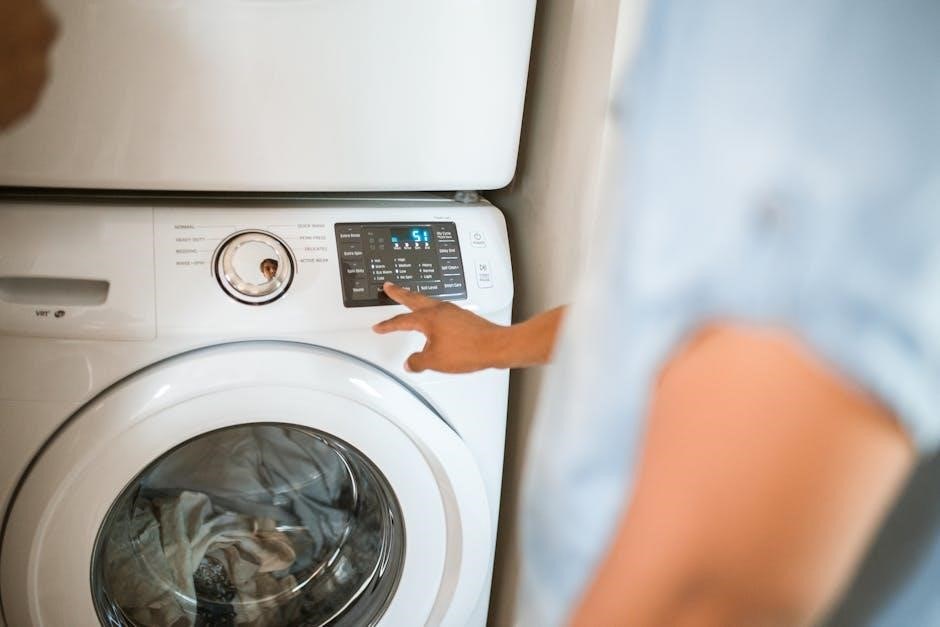
Initial Operation: After connecting to power, press the power button to activate the heater․ The control panel will illuminate, indicating the unit is ready․ Basic Controls: Utilize the “+” and “-” buttons to adjust the desired temperature․ The current temperature will be displayed on the screen․
Heating Modes: Select from available heating modes (Low, Medium, High) using the mode button․ Each mode offers a different heat output․ Remote Control: The included remote control duplicates all functions of the control panel for convenient operation from a distance․
Refer to archived resources for detailed explanations of each function․ Always monitor the heater during initial use and ensure adequate ventilation․ Proper operation maximizes comfort and efficiency․
Powering On/Off and Basic Controls
Powering On: To activate your LifeSmart Infrared Heater, firmly press the prominent power button located on the control panel or utilize the corresponding button on the remote control․ A clear indicator light will illuminate, confirming the unit is operational․
Powering Off: Press the power button again to deactivate the heater․ The indicator light will extinguish, signifying the unit is safely turned off․ Temperature Adjustment: Employ the intuitive “+” and “-” buttons to precisely set your desired room temperature․
Mode Selection: Cycle through available heating modes – Low, Medium, and High – using the dedicated mode button․ Consult archived resources for optimal settings․ Ensure proper ventilation during operation․
Temperature Settings and Adjustment
Adjusting the Temperature: Your LifeSmart Infrared Heater offers precise temperature control via the “+” and “-” buttons on the unit’s control panel, or conveniently through the remote control․ Each press adjusts the set temperature by 1°C/2°F․
Temperature Range: The heater operates within a temperature range of 15°C to 37°C (59°F to 99°F)․ The current set temperature is displayed on the digital screen․ For optimal comfort, begin with a moderate setting and adjust as needed․
Preset Modes: Explore preset temperature modes like ‘Comfort’, ‘Eco’, and ‘Fast Heat’ for simplified operation․ Refer to archived manuals for detailed mode descriptions․ Always ensure adequate space around the heater for efficient heat distribution․
Timer Function – Scheduling Your Heat
Setting the Timer: The LifeSmart Infrared Heater’s timer function allows you to schedule operation for convenient and energy-efficient heating․ Access the timer settings via the “Timer” button on the control panel or remote control․
Timer Duration: You can set the timer to automatically turn off the heater after a specified duration, ranging from 30 minutes up to 8 hours, in 30-minute increments․ The remaining time will be displayed on the digital screen․
Scheduling Options: Some models may offer 24-hour scheduling, enabling you to pre-set heating times for different parts of the day․ Consult archived manuals for advanced scheduling features․ Ensure the clock is accurately set for precise timer operation․
Remote Control Operation – A Detailed Overview
Remote Control Functions: Your LifeSmart Infrared Heater includes a dedicated remote control for convenient operation from a distance․ The remote replicates all functions available on the heater’s control panel, including power on/off, temperature adjustment, and timer settings․
Button Layout: Familiarize yourself with the button layout․ Key buttons include Power, Temperature Up/Down, Timer, and Mode selection․ Ensure the remote is pointed directly at the heater’s receiver for optimal responsiveness․
Battery Installation: The remote requires batteries (typically AAA or AA – check your model’s specifications)․ Replace batteries when the remote’s range diminishes or becomes erratic․ Refer to archived resources for specific battery types; Proper battery installation ensures reliable control․

Maintenance and Troubleshooting
Regular Maintenance: To ensure optimal performance and longevity, perform routine maintenance on your LifeSmart Infrared Heater․ This primarily involves keeping the heating elements clean and free from dust accumulation․ Disconnect the heater from the power source before cleaning․
Cleaning Procedure: Use a soft, dry cloth to wipe down the exterior surfaces․ Avoid using abrasive cleaners or liquids, as these can damage the finish․ For stubborn dirt, a slightly damp cloth may be used, followed by thorough drying․
Troubleshooting Common Issues: If the heater fails to power on, check the power cord and outlet․ If the heater isn’t heating, verify the temperature setting and ensure the timer isn’t active․ Consult archived manuals for detailed error code explanations and solutions․
Cleaning Your LifeSmart Heater
Safety First: Before initiating any cleaning procedure, always disconnect your LifeSmart Infrared Heater from the power outlet․ This prevents accidental electric shock and ensures your safety during maintenance․ Allow the unit to cool completely before handling․
Exterior Cleaning: Use a soft, dry cloth to gently wipe down the exterior surfaces of the heater․ Avoid applying excessive pressure, which could damage the finish․ For fingerprints or light dust, a microfiber cloth works exceptionally well․
Heating Element Care: Do not use liquids or abrasive cleaners on the heating elements․ A soft brush attachment on a vacuum cleaner can carefully remove dust buildup․ Refer to archived resources for specific cleaning recommendations related to your model․
Regularity: Clean your heater regularly, especially during and after peak heating seasons, to maintain optimal performance․
Common Issues and Solutions
Heater Won’t Turn On: First, verify the power cord is securely plugged into a functioning outlet․ Check your circuit breaker or fuse box to ensure the circuit hasn’t tripped․ If the issue persists, consult archived manual resources for model-specific troubleshooting․
Insufficient Heat: Ensure the heater isn’t obstructed by furniture or curtains․ Confirm the desired temperature setting is appropriately adjusted․ A dirty heating element can also reduce efficiency – refer to the ‘Cleaning’ section․
Remote Control Not Working: Replace the batteries in the remote․ Ensure there’s a clear line of sight between the remote and the heater’s receiver․ Try resetting the heater by unplugging it for a few minutes․
Error Codes: Refer to the ‘Error Codes and Their Meanings’ section for specific guidance․
Error Codes and Their Meanings

E1: Overheat Protection․ The heater has detected an internal overheating condition․ Immediately power off the unit and allow it to cool completely before attempting to restart․ Ensure proper ventilation isn’t obstructed․
E2: Sensor Failure․ Indicates a malfunction with the internal temperature sensor․ Contact customer support for assistance, as this may require professional repair․ Do not attempt self-repair․
E3: Tip-Over Switch Activated․ The heater has detected it’s been tipped over․ Carefully upright the heater on a stable, level surface․ The unit should reset automatically, but may require a power cycle․
E4: Communication Error․ (App-Controlled Models) Indicates a loss of connection between the heater and the LifeSmart app․ Check your Wi-Fi connection and app settings․ Consult archived resources for connectivity troubleshooting․
Advanced Features & Smart Home Integration
App Control: Download the LifeSmart Living app (iOS & Android) for remote control of your heater․ Adjust temperature, set timers, and monitor energy usage from anywhere with an internet connection․ Explore customized heating schedules for optimal comfort․
Voice Control: Seamlessly integrate your LifeSmart heater with Amazon Alexa or Google Assistant․ Use voice commands to power on/off, adjust temperature, and more – hands-free convenience at its finest! Ensure proper app linking for functionality․
Smart Scenes: Create automated “scenes” within the LifeSmart app․ For example, a “Cozy Evening” scene could dim lights and set the heater to a comfortable temperature simultaneously․ Explore archived resources for scene creation tips․
IFTTT Compatibility: Connect your heater to other smart devices using IFTTT (If This Then That) for advanced automation possibilities․
App Control and Connectivity (if applicable)

LifeSmart Living App: Download the free LifeSmart Living app from the App Store (iOS) or Google Play Store (Android)․ Create an account or log in to an existing one to begin connecting your infrared heater․
Wi-Fi Connection: Ensure your smartphone and heater are connected to a stable 2․4 GHz Wi-Fi network․ The app will guide you through the pairing process, requiring your Wi-Fi password․ A strong signal is crucial for reliable control․
Device Discovery: Within the app, select “Add Device” and follow the on-screen instructions to discover your LifeSmart heater․ The heater may need to be in pairing mode (refer to the ‘Setting Up’ section)․

Remote Access: Once connected, you can control your heater remotely, adjust settings, and monitor its status from anywhere with an internet connection․ Explore archived app tutorials for advanced features․
Voice Control Compatibility (if applicable)

Seamless Integration: Your LifeSmart Infrared Heater is designed for compatibility with popular voice assistants like Amazon Alexa and Google Assistant, offering hands-free control․
Linking Your Account: Within the Alexa or Google Home app, navigate to “Skills” or “Services” and search for “LifeSmart․” Enable the skill/service and link it to your LifeSmart Living account․
Voice Commands: Once linked, you can use voice commands such as “Alexa, turn on the heater” or “Hey Google, set the heater to 70 degrees․” Discover a full list of supported commands within the LifeSmart Living app․
Custom Routines: Integrate your heater into custom routines for automated heating schedules․ For example, “Good Morning” could turn on the heater and adjust the temperature․ Explore archived voice control guides for optimal setup․
Energy Saving Tips for Optimal Use
Maximize Efficiency: To minimize energy consumption and lower heating costs, utilize these practical tips with your LifeSmart Infrared Heater․ Strategic use enhances comfort while reducing your carbon footprint․

Zone Heating: Focus heat only on occupied rooms, rather than heating the entire house․ Infrared heaters excel at providing targeted warmth, making them ideal for zone heating․
Smart Scheduling: Leverage the timer function within the LifeSmart Living app to schedule heating periods aligning with your daily routine․ Avoid unnecessary operation during unoccupied times․
Temperature Optimization: Lower the thermostat or heater setting by a few degrees and utilize layers of clothing for added warmth․ Every degree saved contributes to energy conservation․ Consult archived resources for further efficiency insights․